
How to Operate a Multi-Tier Cannabis Grow with Maximum Yield
Learn the Tips and Tricks of Operating a Multi-tier Cannabis Growing Space
Are you interested in learning the tips and tricks of operating a multi-tier cannabis growing space? Listen to our most recent webinar, “Tricks of the Trade: Operating a Multi-Tier Cannabis Grow,” presented by Michael Williamson and Anders Peterson with Maximum Yield. This webinar offers an overview of key strategies and insights needed to operate a multi-tier cannabis cultivation facility successfully.
Learn how to improve your facility operations by gaining new insights for your grow room. Discover essential Key Performance Indicators and metrics to enhance your performance and create customized operational strategies for each production phase.
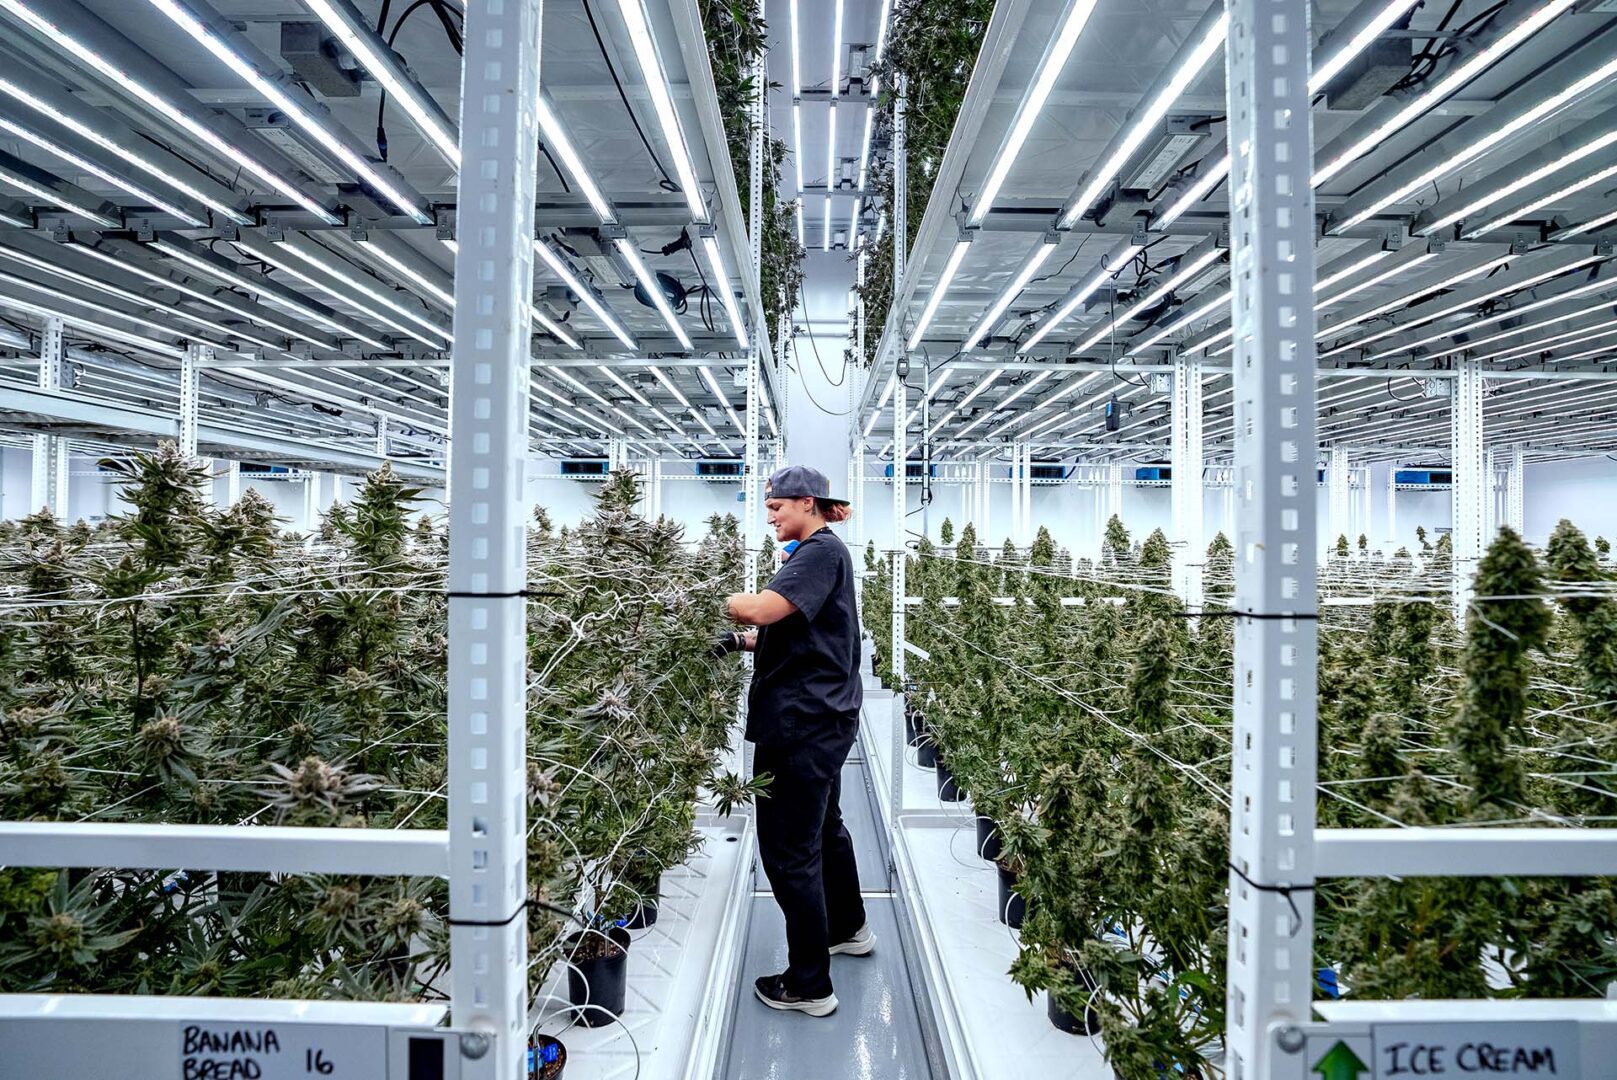
Setting The Stage – Key Differences between Single-Tiered HPS vs. Multi-tier LED Cultivation
Many new moving parts may not integrate when starting and operating a new multi-tiered cultivation facility. By pre-planning and focusing on KPIs, you can stay ahead of your competition by making data-driven decisions. First-time commercial growers should consider having support from an experienced team member or consultant with a proven track record in mobile vertical grow racks. Cultivators with a collaborative approach with teammates and consultants with divergent but complementary skill sets typically result in best-in-class operations. Be prepared to pivot, as the market is constantly shifting. A common concern from a single-tiered high-pressure sodium, HPS, cultivator thinking about going multi-tier is concerns about reaching quality and yield goals.
The main difference between the two is the amount of the anticipated yield. The best single-tier HPS cultivators receive between 90 and 120 grams per square foot, roughly 200 to 260 pounds per harvest. Our typical LED cultivators are between 65 and 80 grams or more per square foot, slightly less than single-tier, but the number of grams will be per tier. Combining those two tiers means we have 132-160 plus grams per square foot, equating to about 285 to 350 plus pounds per harvest. These numbers may not seem like too big of a difference, but when looking at the difference in revenue, three-tiered LED cultivators are getting 190 to 240 grams per square foot; this ends up being about 530 pounds in the same room as a single-tiered HPS cultivator who was peaking at 260 pounds.
Something we also see as a limiting factor to quality and yield that we typically see within multi-tier is the room design itself, specifically around the mechanical system or HVAC design, and poor airflow. If your grow uses HPS, you typically focus on climate and root zone strategies. Those strategies are not very easy to take and apply to LEDs. With LEDs, you will need to slightly change all of your growth parameters to account for a different lighting spectrum. With LEDs, you can push your plants harder with different growth parameters. You can now raise your room temperatures with LEDs to achieve the same leaf surface temperature and VPD.
For more information about the design of multi-tier cannabis grow rooms, head to our previous webinar blog, Multi-Tier Grow Room Design: Measure Once, Build Twice.
Key Performance Indicators (KPI’s)
Key Performance Indicators, KPIs, are how cultivators gauge performance and improve operations each harvest. Using data-driven cultivation with your KPIs helps keep a lot of the guessing work out of growing and allows you to make quicker and more decisive decisions on what is occurring in your garden. There are many KPIs and cultivation metrics to follow, but three main components can typically have the most significant impact on your business. The three components are yield returns, turns or harvests per year, and labor metrics.
1. Yield Returns
Historically when referring to yields we were referring to pounds of sellable product per light. Now, a universal metric to discuss yield is in grams of sellable product per square foot of canopy (or grams per square foot).
Those who have mastered the art of efficient room designs are consistently achieving remarkable yields of 80 grams per square foot in every cultivation cycle. It’s important to note that the key factor separating growers in the lower yield range is the need for mechanical system design, HVAC, and dehumidification improvements. By addressing these crucial aspects, growers can unlock their true potential and reach new levels of success.
2. Turns or Harvests Per Year
We encourage cultivators to have minimal downtime in between harvests. Ideally, this means a next-day room reset after you have harvested your plants – harvesting all of the plants in one day or shift in that flowering room or zone, cleaning and sanitizing that room ideally, same day or the very first thing you do the next morning. Cultivars could even have an evening shift in between if that’s an option, then you’re resetting and repopulating that flower room the very next day.
Cultivators should have minimal downtime between harvests because when you have nine-week flowering cultivars, that will equal 5.8 harvests per year. Each day that you’re not flowering has a significant ramification in potential revenue loss. For example, a 10,000-square-foot flowering canopy estimated at $1,000 per pound would equate to $6.3 million a year. If you take a week for turnaround time between rooms, even five days, that will end up being 5.2 harvests per year, coming out to be $5.7 million yearly.
3. Labor Metrics
Labor is hands down an operator’s most significant expense and can be the most difficult to manage. Labor contributes to roughly 30 to 40% of the cost of production. There has been a shift in tracking labor from a KPI standpoint. We would typically see how many growers there are per light.
A standard number would most likely be about one grower per 50 lights. We look at it in terms of employees per square foot of flowering canopy. Common industry practice is one cultivation employee per 800 to 1200 square feet flowering canopy.
Production Phases
Mother Room
One of the most significant shifts we’ve seen in mother plant production is moving away from single-tier mother plants to a multi-tier mother plant structure. Instead of growing large mother plants, growers utilize small to medium-sized plants to stagger production. The benefit of working with small to medium-sized mother plants is that you can maintain the mother plants’ health easier and receive more uniform cuttings. All the different uniform cuttings from the side and inside of the mother plants have different metabolism and strength toward lighting.
Production Schedule for Mother Plants:
Typically, you see a production schedule for a grow operation, but rarely do you hear of a mother production schedule. The plants you choose as your mother plants should not be the leftover or aftermath of your veg batch moving into flower; they should be the healthiest of all the plants possible because that is the foundation for the future of all your batches. One trend gaining popularity is a clone-to-kill model or a cut-to-kill model. The advantage of a clone-to-kill or cut-to-kill model is you can only take cuttings off the plant once, and then you destroy that mother plant. These models give you some of the healthiest clones, but the downside is that the plants themselves take up valuable space, so you must create square footage when planning. The benefit of a multi-tiered environment for your mother plants is you can most likely shrink your mother room and have more mother production. When you shrink your mother room, you free up critical floor space for other parts of your operation.
Vegetative Room
In the vegetative phase, this sets the pace for your production cycle, determining how your plants will perform and flower. In this phase, uniformity and consistency batch to batch is critical. Vegetative strategies and lengths vary for every facility based on pot size, plant counts, targeted finished plant height, or tier heights. If you’re growing a lot of new genetics, we recommend measuring the internodal length every few days to track the growth rate and then begin grouping similar cultivars. Depending on how much each cultivar tends to stretch and the height of your growth tiers and flower, you can then vary your veg time from three days up to two or three weeks to get your desired finished plant height. The more dialed in your climate and root zone parameters are in your veg room, the faster your plants will root and grow more shoots, reducing your total veg time and allowing you to get more terms per year out of your cannabis facilities.
Plant Stress
All canopy management or plant training techniques have a cost regarding plant stress, which can add up if you must be more careful and timely in your plant process flow. Compounding stress events can result from multiple stress events all at once. For example, transplanting the plant into a new substrate, skirt or trimming up the bottoms of the plant, topping the plant, adjusting growth parameters like lighting, intensity, what type of lighting, the environment can be different, and humidity as they transition from bench to flower.
Flower Room
When operating a multi-tier flower room, transitioning the plants to flower and timing the stretch is crucial. Before moving plants from the veg room into the flower room, it’s best to preset the flower room’s climate to match the VPD conditions in your veg room. Preseting the room will help limit the stress on the plants during the transition. Once your plants have transitioned into flower, you can expect rapid growth over the first two to three weeks, with plants tripling or quadrupling in size. This rapid growth is the stretch phase of the flower cycle. The goal is to have the plants finish about six to twelve inches away from the lights at harvest, depending on your fixtures.
It’s best to start pinching the taller nodes and weaving branches through the canopy trellis right after transplant to get everything uniform in height, then continue pinching, bending, and trellising throughout the stretch to help with the stretching phase. Your defoliation strategy is also essential and used throughout flower defoliation. Plucking or removing leaves from the canopy to thin it out will help with humidity and airflow issues, along with reducing the number of leaves that have become sinks for valuable plant resources.
Harvesting Strategy
Harvesting is always an exciting time in the cultivation process, but it can be unorganized if not thought through and having a plan set in place. It is always a good practice to do a walkthrough of your flower room one to two days before with whoever is managing that flower room and then to meet with whoever’s working that harvest to have a plan moving forward over the next couple of days to streamline the harvesting.
One technique many people have found helpful in the multi-tier environment to make harvest day and cleanup easier is the dried-down or die-on-the-vine strategy for the last 24 to 48 hours. To utilize this strategy, dimming your lights will lower the signaling senescence and reduce all irrigation. This strategy leverages the transpiration process to dry your plants to get a jumpstart on the drying process before you move them into a dry room. The dried-down or a die-on-the-vine strategy can help dry rooms with undersized humidification capacity. By leveraging transpiration, there is less wet weight to move off the upper and bottom tiers on harvest dates. This strategy can mean the difference in a large flower room of a thousand total pounds you must move in a day, whether that is your substrate weight or the actual biomass itself.
Utilizing Pipp Horticulture’s modular drying carts to help wheel into the flower room to collect the plants for harvest will help minimize plant damage. You can wheel the plants into the dry room, and cultivators can dry them directly on the carts or transition them to drying rack hangers and a whole plant hang technique. It’s essential to wait until all plants are out of the room before cleaning and sanitizing. Handling and moving opened-up substrates, like cocoa, can add particulate fungi and bacteria to the air, contributing to high microbial testing of unfinished flower.
Size the room for your facility layout and dry rooms so that you can harvest a whole room in a single shift, ensuring the entire harvest will fit within a single dry room. If you cannot hold a single crop in a single dry room or do it within a single day, it’s better to have two smaller dry rooms to avoid the issue of plants drying at different rates at different speeds.
In Conclusion
In conclusion, the “Tricks of the Trade: Operating a Multi-Tier Cannabis Grow” webinar can help increase knowledge and skills in facility operations by exploring new perspectives and actionable insights to implement to optimize your processes and drive success. This will ensure a comprehensive understanding of the cultivation process with the knowledge and tools to create a multi-tier grow operation that will succeed in the competitive cannabis market and actionable insights to streamline workflows, reduce costs, and improve plant health and product quality.