5 Best Practices for Your Cannabis Mother Room

5 Best Practices for Your Cannabis Mother Room

Pipp Horticulture Cannabis Mother Room

Be Good to Your Mother(s)

Your indoor cannabis cultivation facility is operating within a highly competitive market. While the point of harvest may seem like the most important link in your production process, you may want to revisit the management of your cannabis mother room. That’s where your business houses its real long-term value. 


The mother room is where your team nurtures the mother plants, which, of course, shape the future of every plant you’ll grow. These mother plants are carefully selected cannabis plants kept in a vegetative state and not allowed to flower. The primary purpose of maintaining these mother plants is to provide a consistent and reliable source of clones or cuttings. These clones are genetically identical to the mother plant, ensuring uniformity in the traits and quality of the plants grown from them, such as potency, flavor profiles, and growth characteristics.

An efficiently managed mother room ensures a steady flow of high-quality clones to fill the other rooms in your facility. 


Your yield and profits begin here.

A successful mother room strategy blends the precision of genetics with the art of cultivation, ultimately developing a shield for your business against the unpredictability of nature. In a market that values both diversity and the reliability of old favorites on the shelf, the ability to sustain and replicate specific cannabis strains with accuracy is invaluable.

So, what goes into a successful cannabis mother room?

A robust mother room operation employs advanced environmental controls, precise nutrient management, and rigorous hygiene protocols to ward off pests and pathogens, ensuring that each clone represents the best possible start for the next generation of plants. We’ll explain five helpful best practices to bear in mind below.

These tips will streamline your team’s cultivation process and cut back on the risk of crop failure. This level of control and efficiency translates into faster turnaround times, higher yield potential, and improved product consistency, ultimately contributing to a stronger market position. 

The success of a commercial indoor cannabis cultivation business is intricately linked to the performance of its mother room.

Double-Stacked Cannabis Mother Room Racks

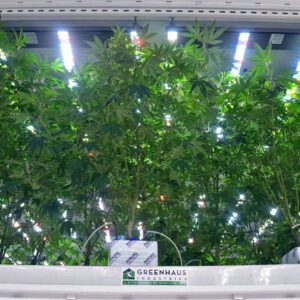
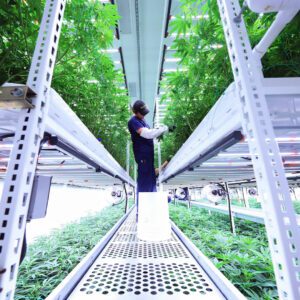
Let’s get into the actual layout of your cannabis mother room. How are these plants supported? Where are they located within the room?

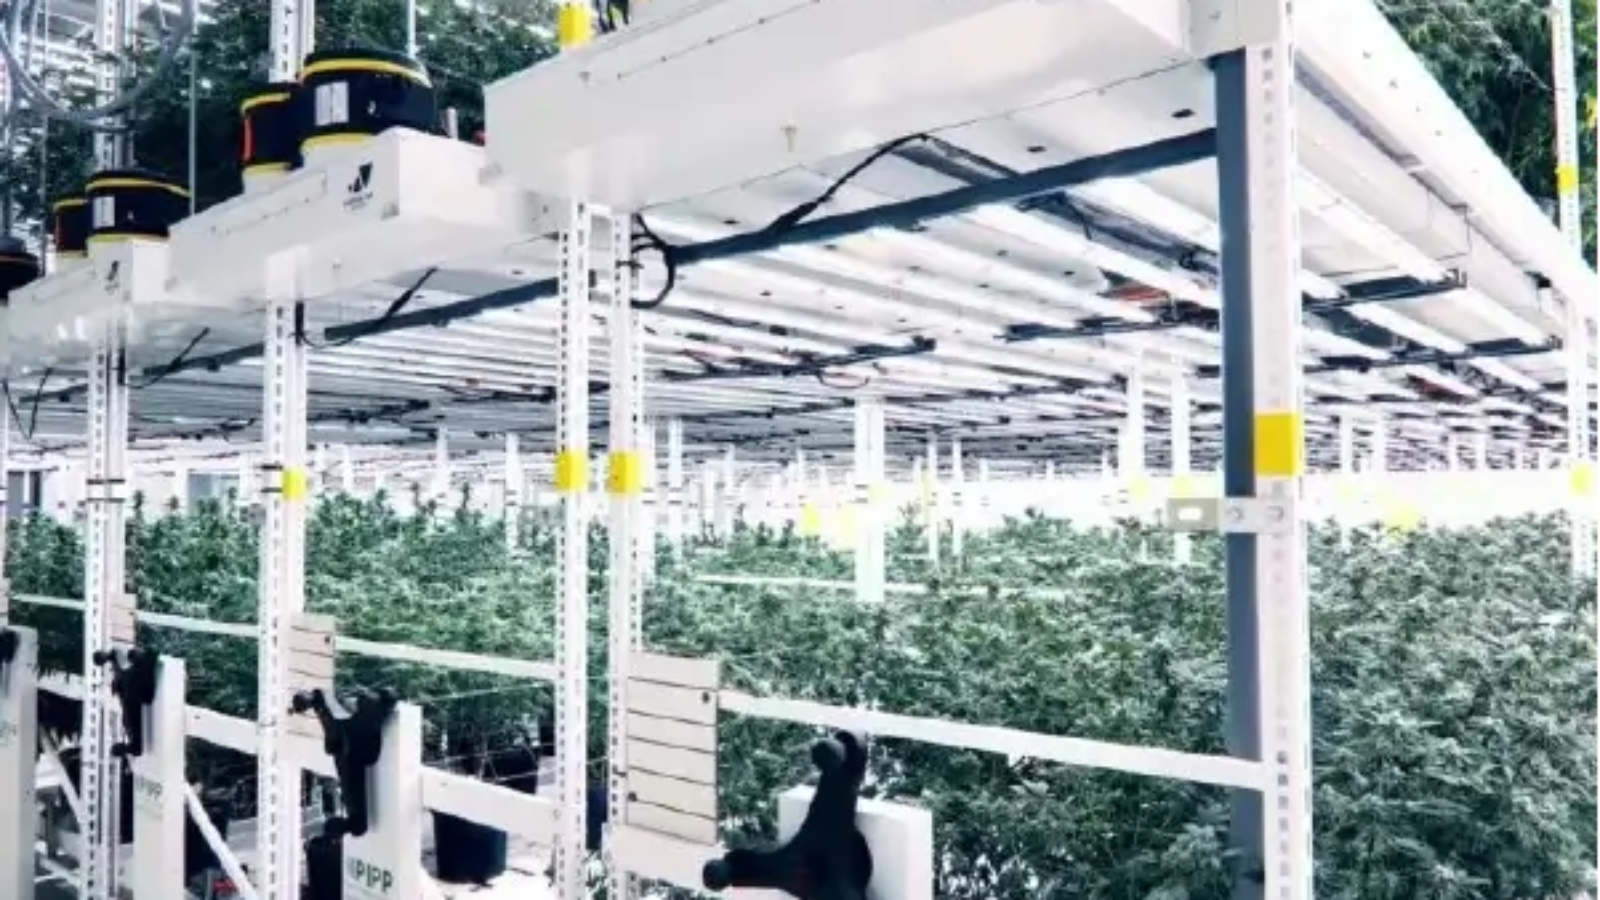
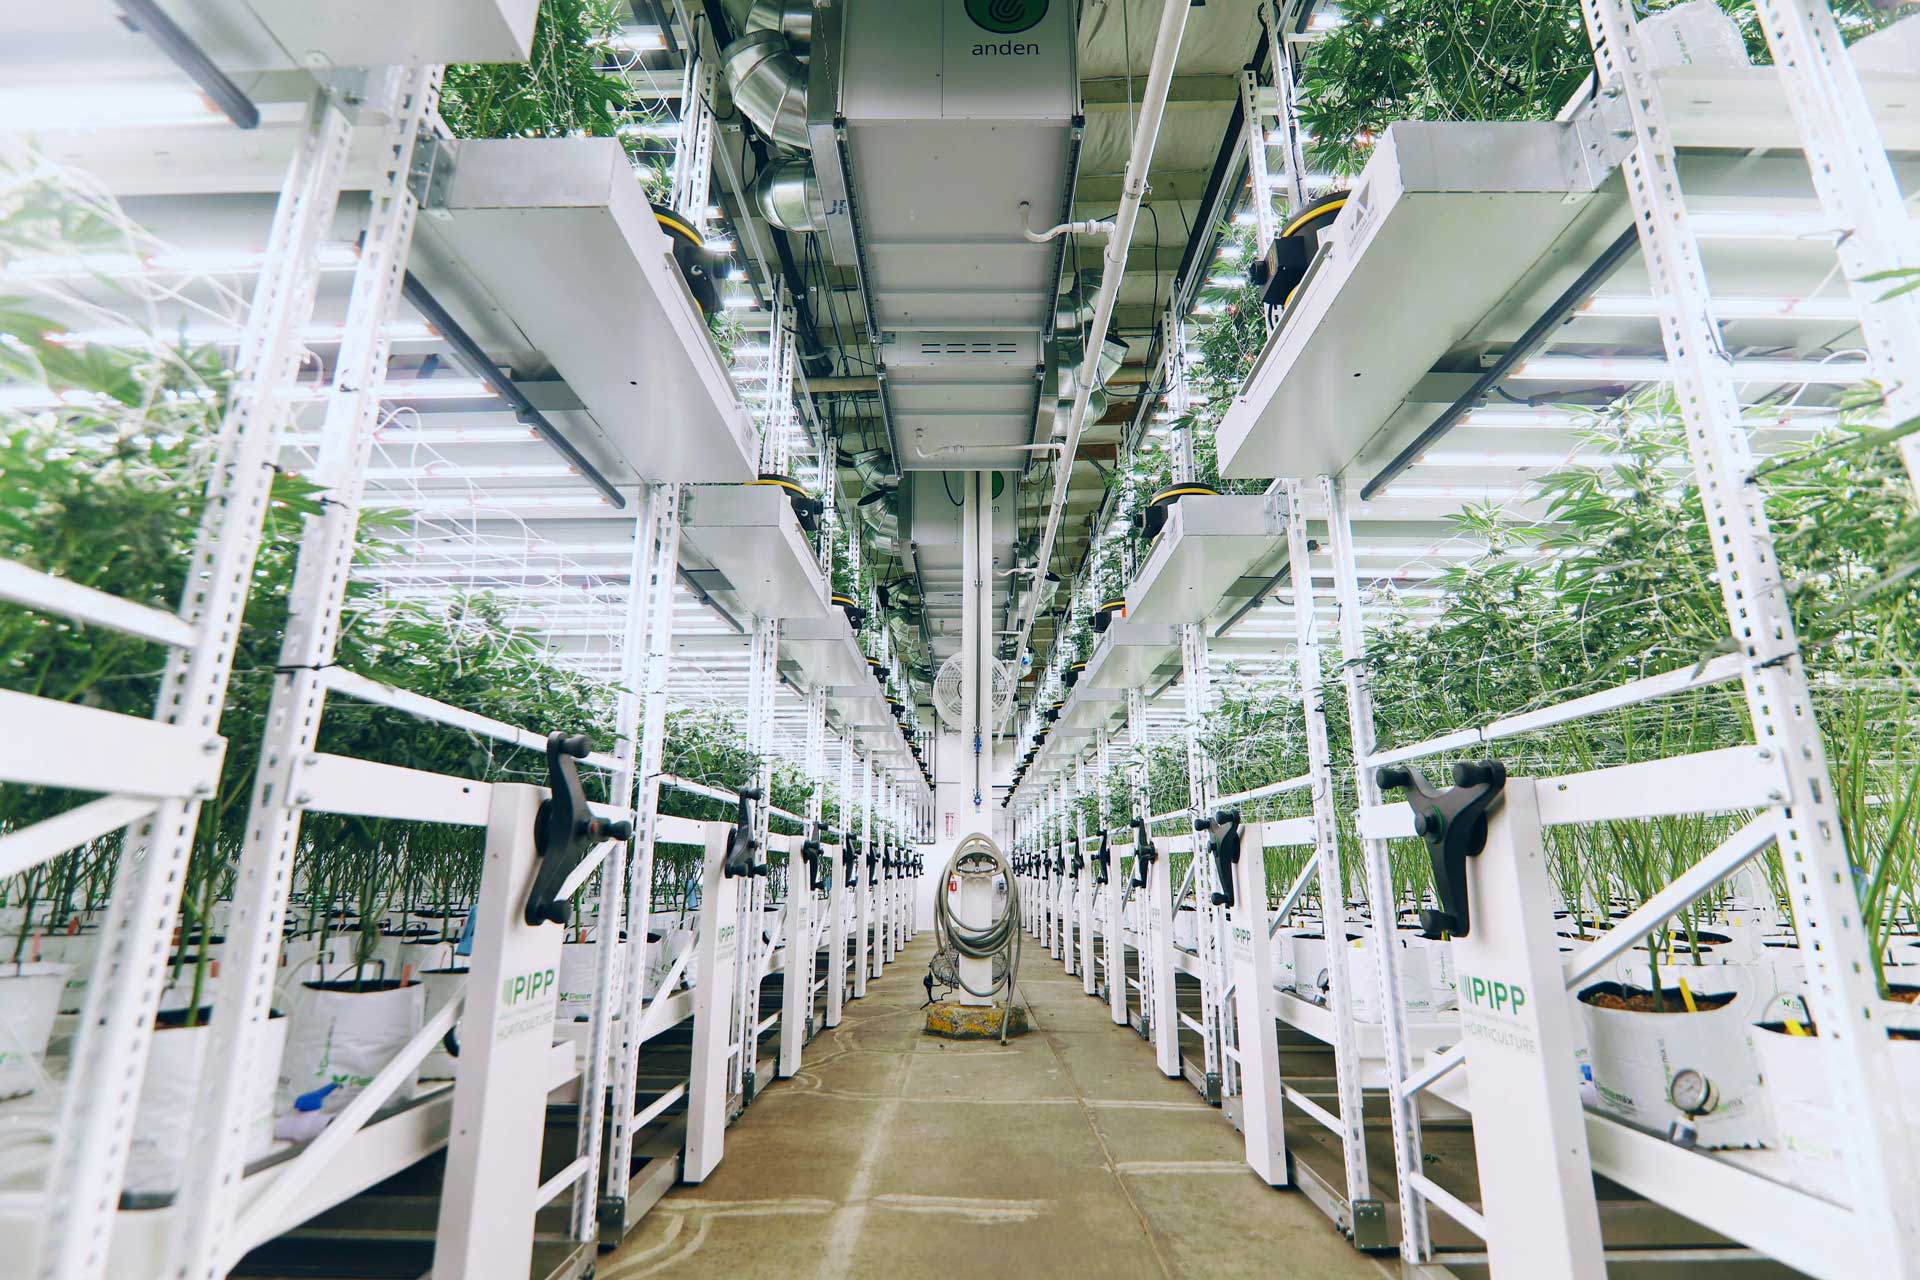
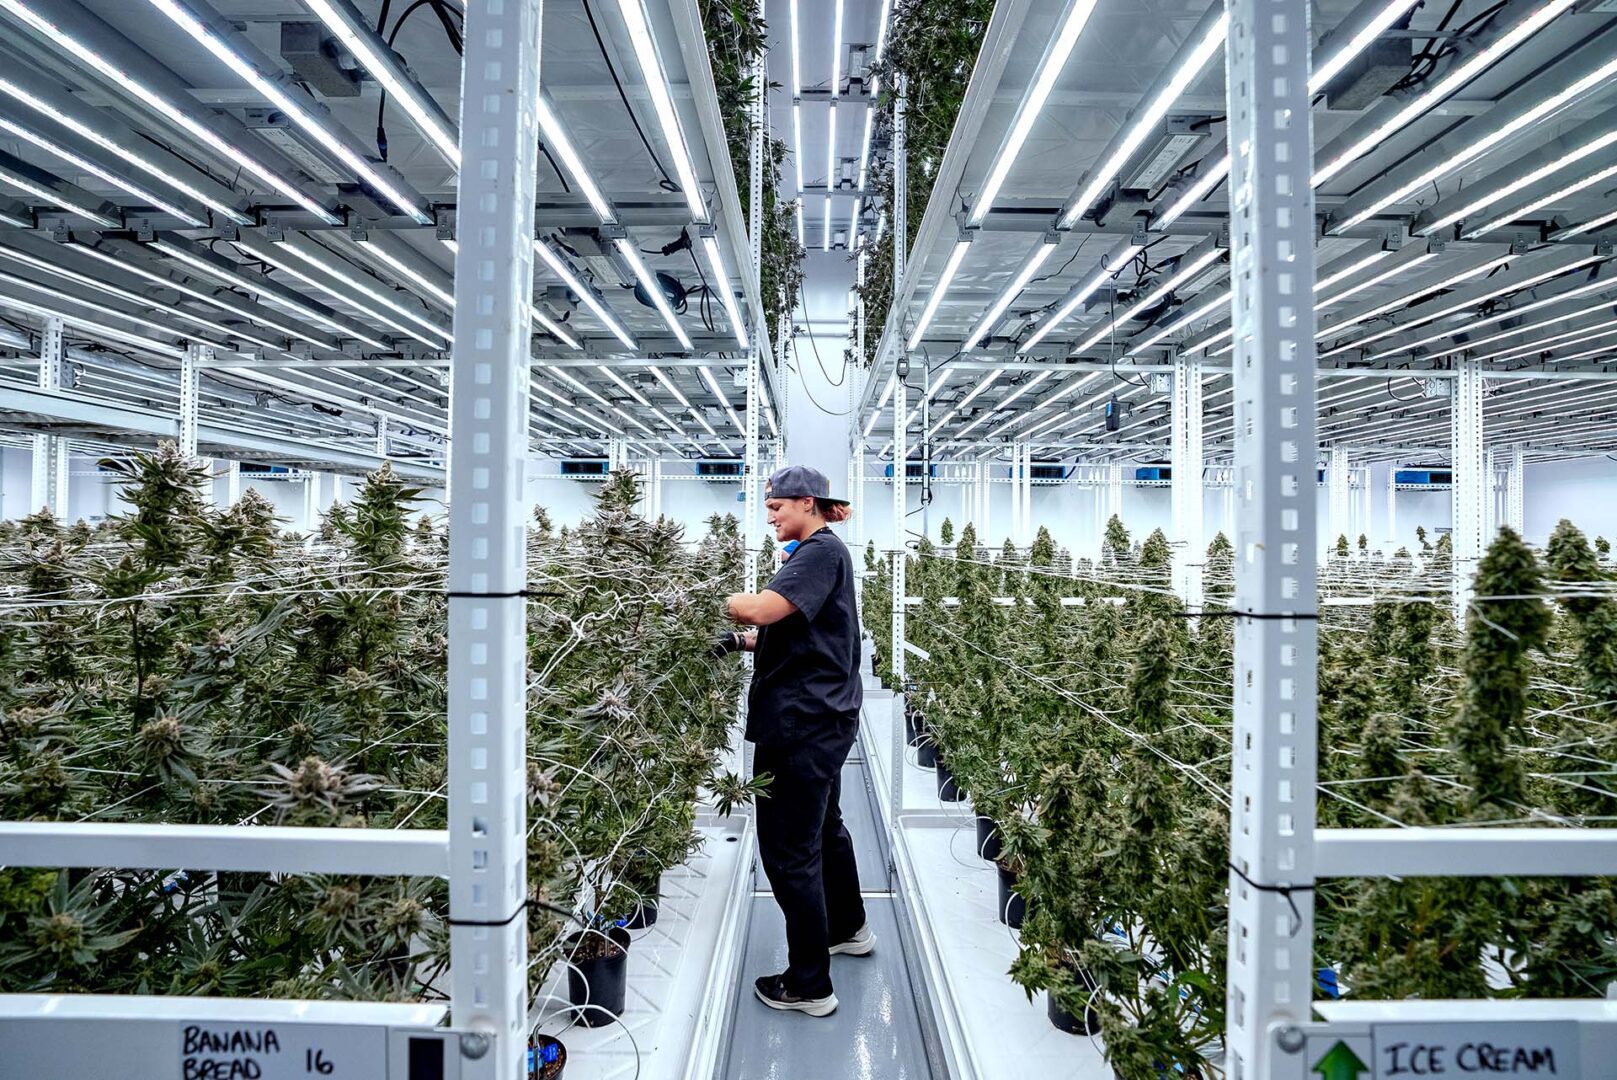
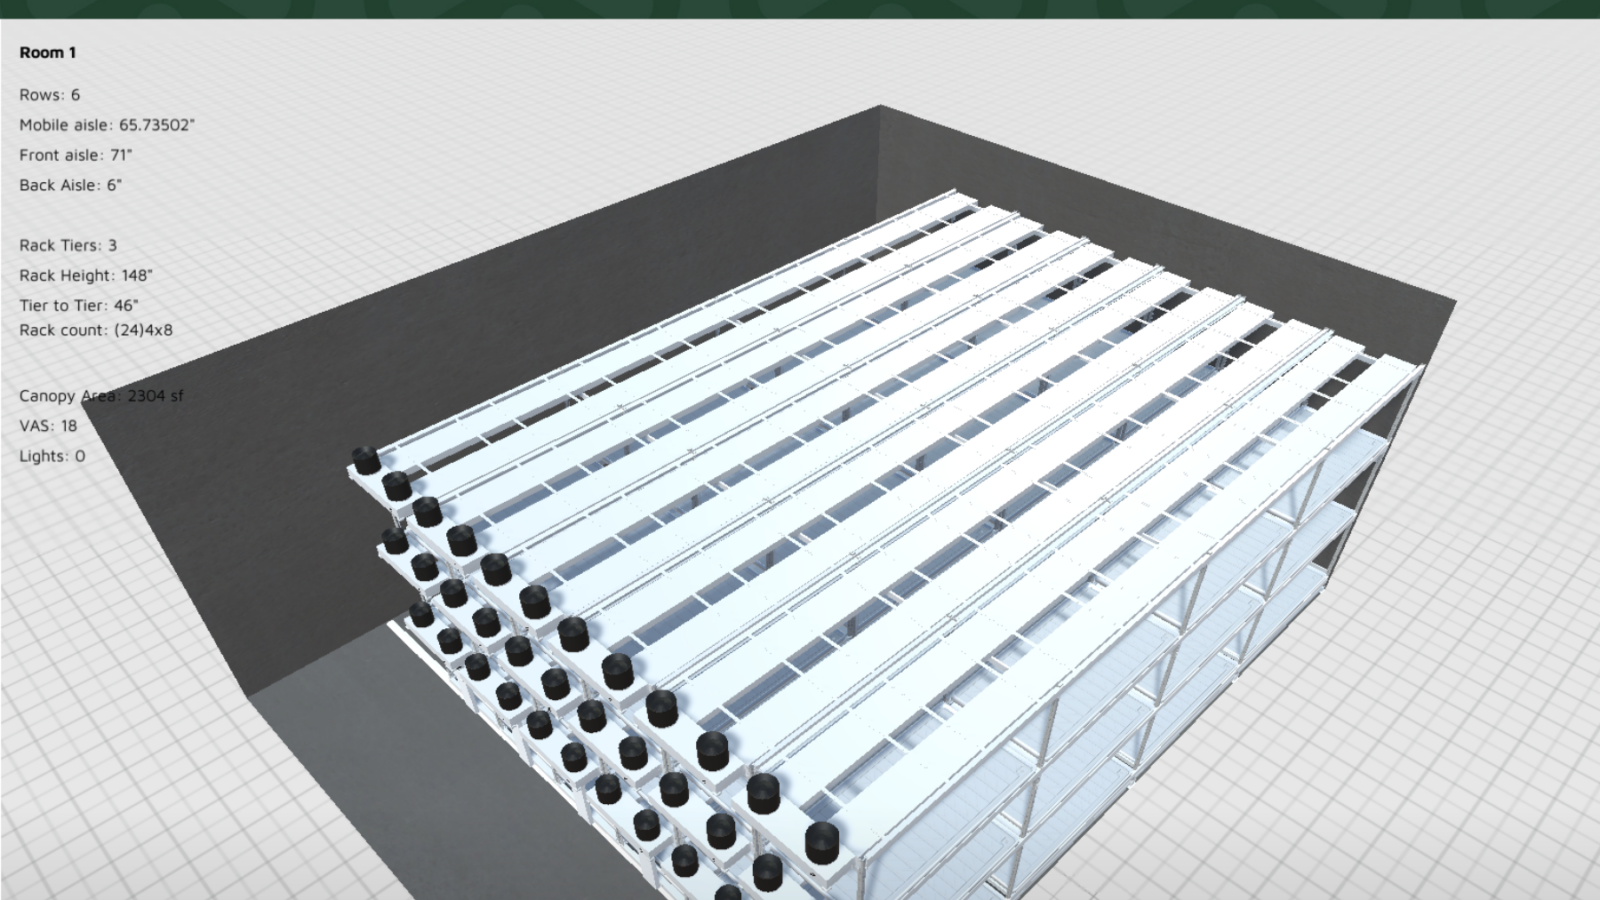
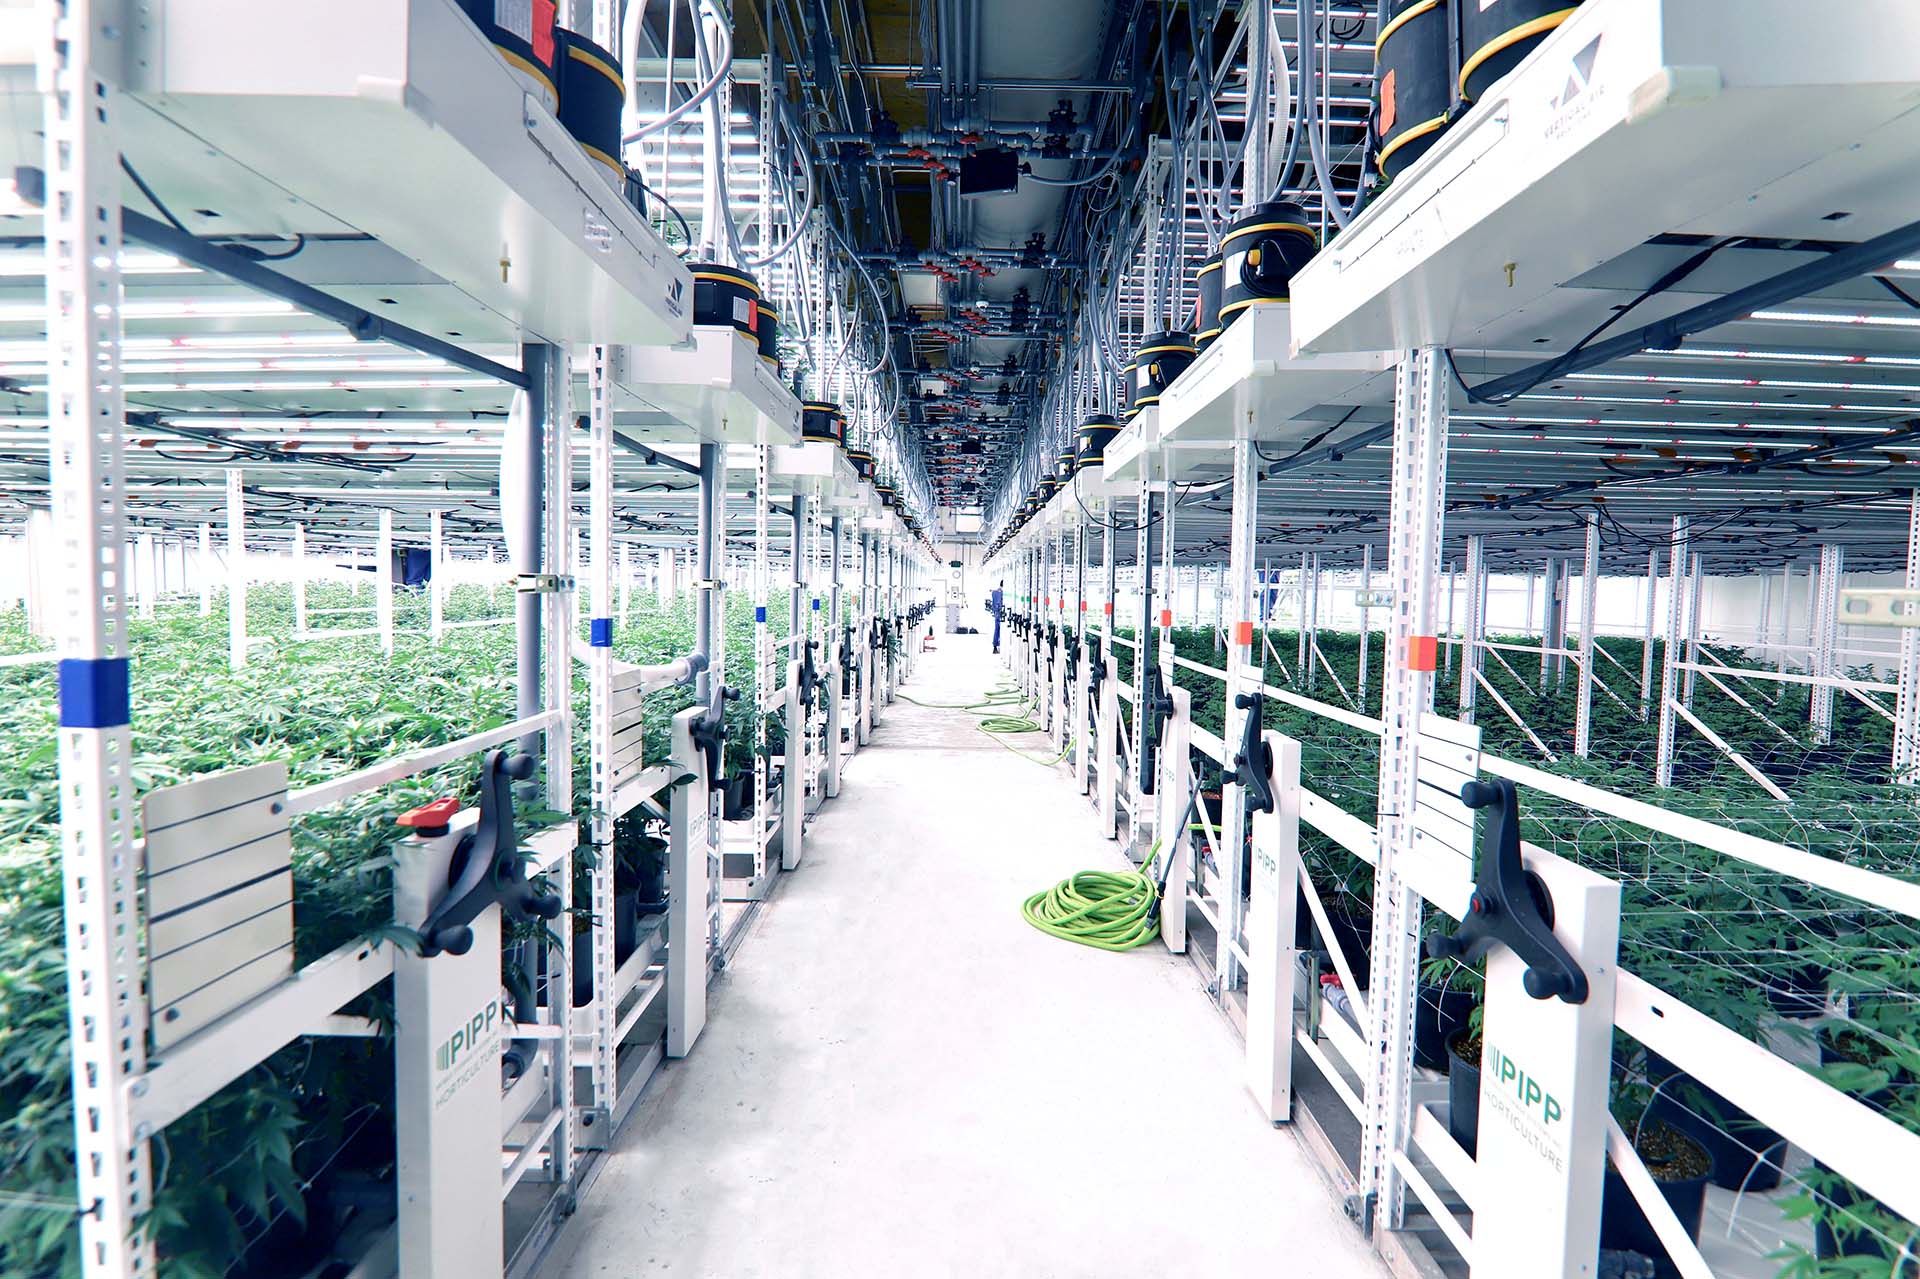
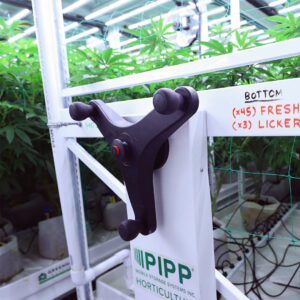
More often lately, our team has seen cultivators double-stacking mother plants and maintaining them for shorter lifespans (as opposed to running a single-level layout with plants that might be sustained for longer time periods). Some cultivation businesses might prefer to hold onto mother plants for upward of a year or more, but the shorter lifespan encourages more supple cuttings and a more agile cultivation team in general. This also limits the risk of pest and pathogen spread. 

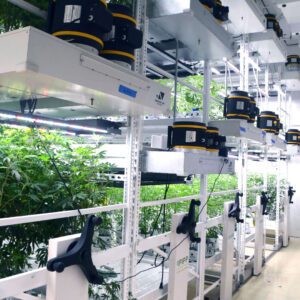
In a 2023 webinar, Pipp’s Director of Horticulture, Anders Peterson said that double-stacking has proven benefits.
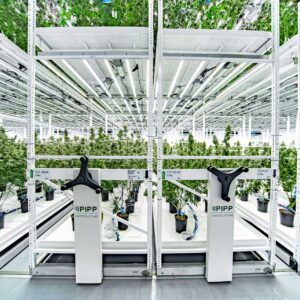
Generally, I’ll keep my younger mothers on the top level, which is typically a shorter elevation, as far as its height,” he said. “The bottom elevation, which will be taller in height, … can hold my more mature mothers.” 

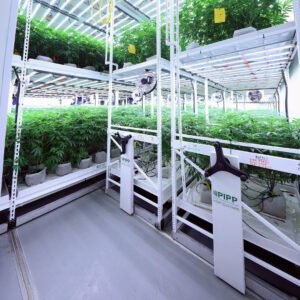
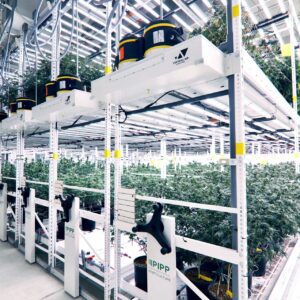
Maintaining younger mother plants in your cycle balances the diversity of the room and allows for higher quality: We’ve noticed grow teams getting a significant increase in “A-grade” cuttings versus the older mother plants. Double-stacked mother rooms help house additional genetics in a smaller space, allowing you to allocate square footage for flower production.

READ MORE: See how much revenue you could be generating by going vertical!

There’s a balance, of course, in serving the market with tried-and-true genetics that will sell easily and providing dispensaries with more cutting-edge cultivars that might be a bit more experimental or nuanced in their demand curves. A diverse, double-stacked mother room lends some of that flexibility to your business.

Pro Tip: Good ventilation is essential to prevent microclimates within the tiers. Use oscillating fans and ensure your room's HVAC system is capable of circulating air effectively throughout the stacked racks. Proper airflow helps to maintain consistent temperature and humidity levels across all levels, minimizing the risk of mold and pests.

Optimal Environmental Conditions

Your facility runs on the efficiency of its environmental control system, but you must add a layer of redundancy by personally checking on the actual variables (temperature and humidity, foremost) on a regular basis. Automated systems are fine and increasingly prevalent, but your team should not solely rely on them. The value of the plants in your cannabis mother room is simply too great. Reliable handheld sensors (for variables such as temperature and relative humidity, among others) can be used to double-check and verify the automation and control platform data.

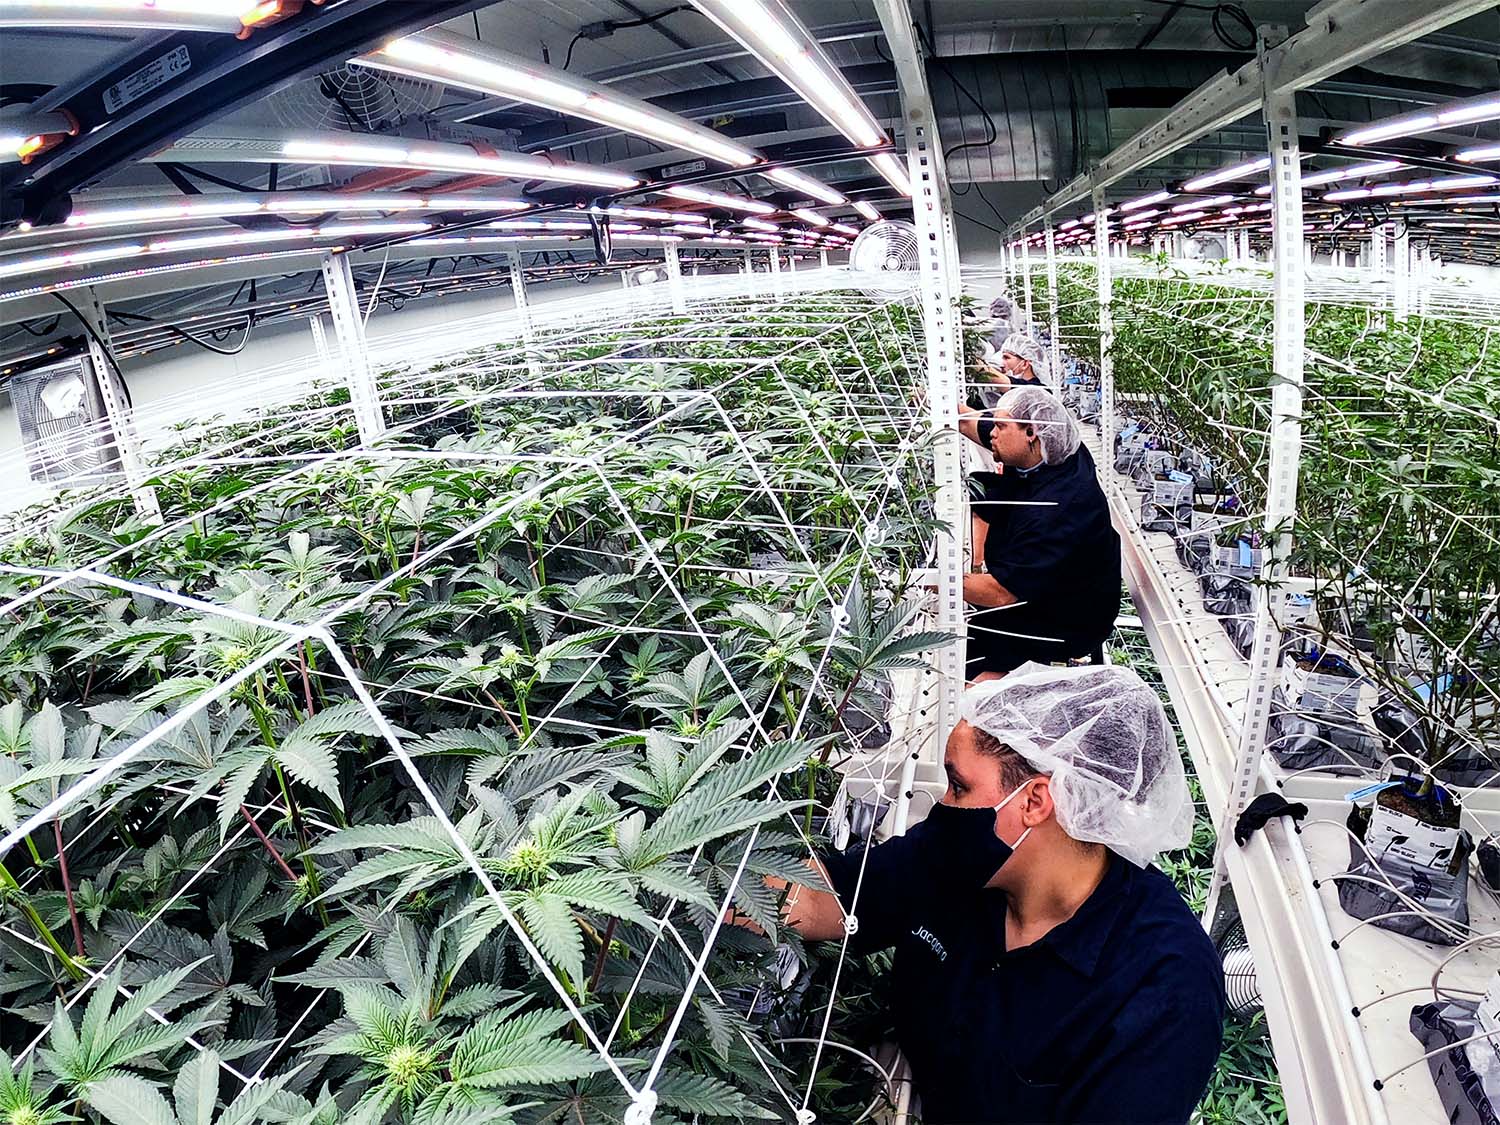
This may go without saying, but it’s worth underscoring the importance of daily touchpoints with your mother plants. In between cuttings, the maintenance of your plants is absolutely critical. 

Keep your mother plants in veg by maintaining an 18-hours-on/6-hours-off lighting schedule. Inspect and clean all light fixtures to ensure optimal output–and do whatever you can to prevent light leaking in from the hallway. In fact, implement a rotation schedule for light bulbs to maintain consistent light intensity and spectrum. 

That point about equipment maintenance is especially important in your mother room. Here’s a quick checklist of items you’ll want your team to manage on a clear, regular basis:

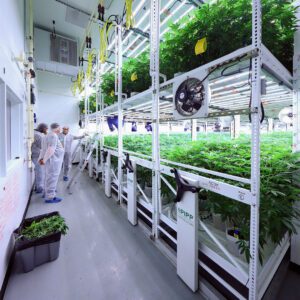
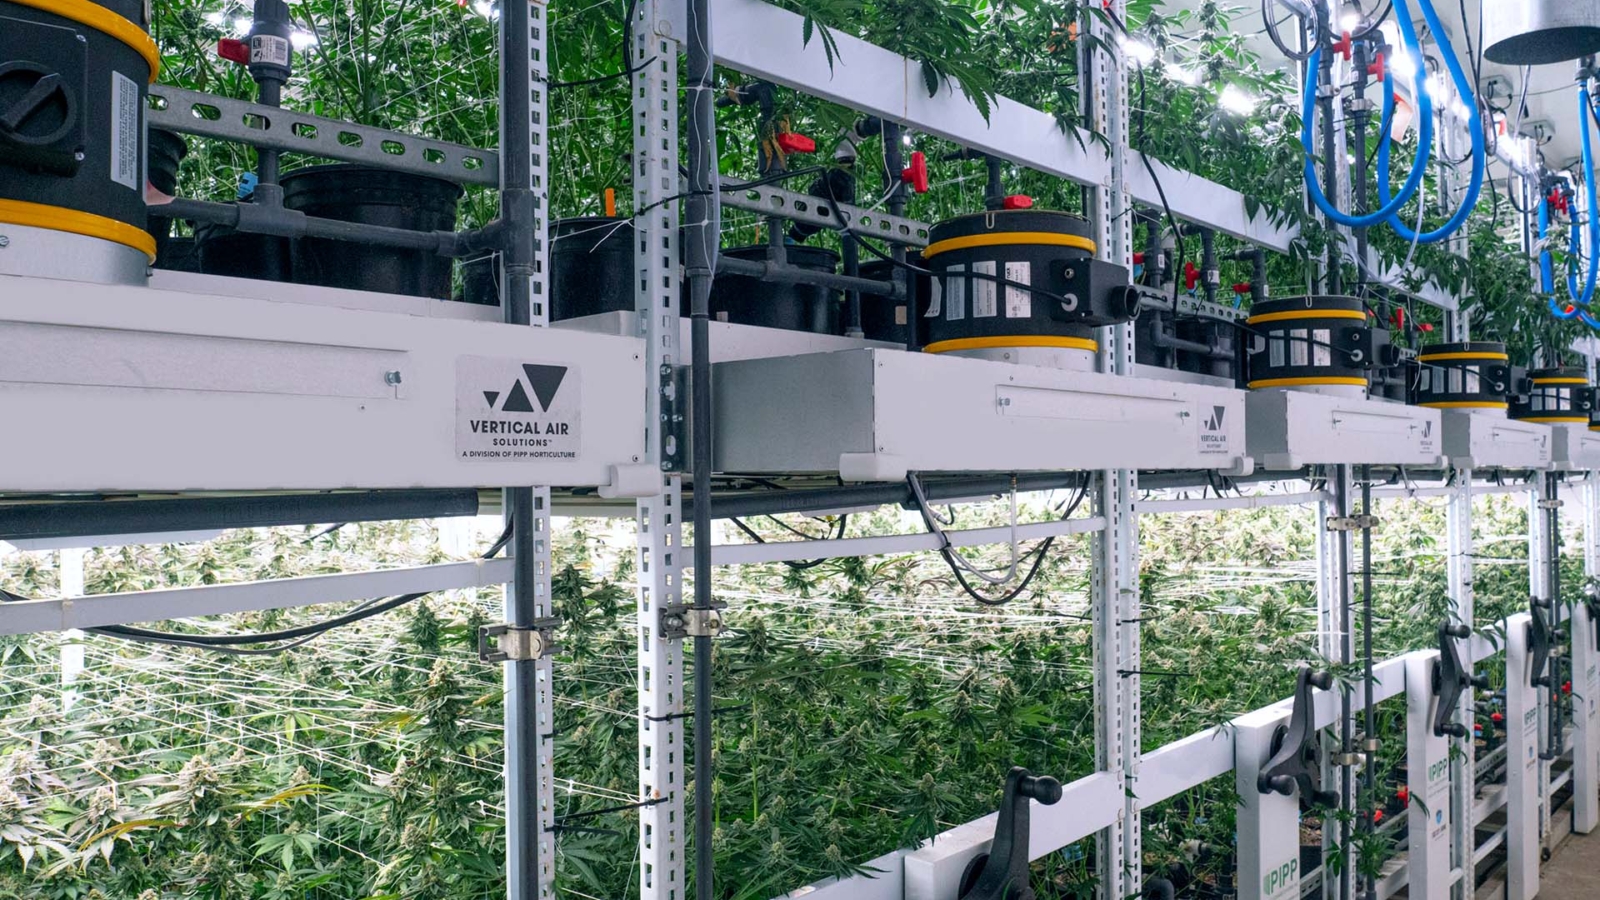
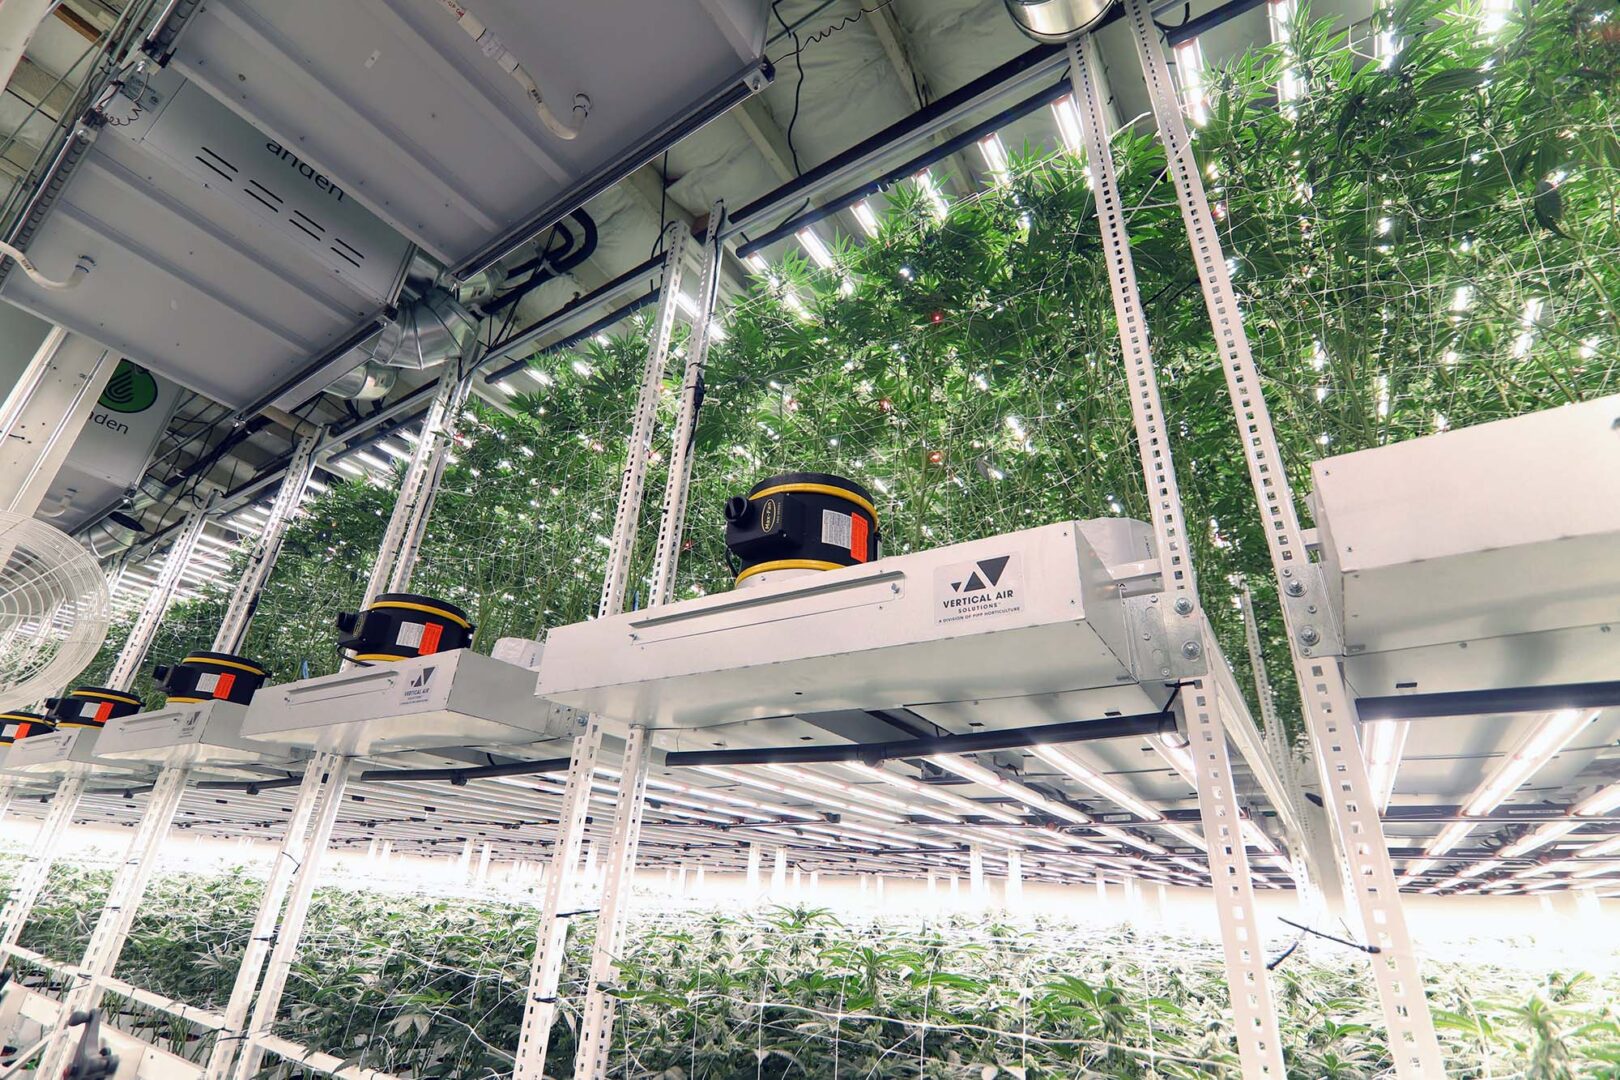
  • Check the efficiency of your ventilation system on a regular basis. Effective air circulation is the backbone of maintaining stable temperature and humidity levels in your mother room, (i.e., maintaining stable genetic lines!) and warding off mold and pests. Change your HVAC filters on a regular basis.
  • Check the sensors in your mother room to ensure accurate temperature and humidity monitoring. This goes back to that idea of redundancy and the human touch; you can’t rely solely on your automated data feeds. To maintain the accuracy of these systems, regular calibration should be part of your maintenance schedule as well. This ensures that your plants are always growing in the ideal conditions they need for optimal health.
  • Check on your airflow system in this room. If your ventilation system is in good shape, your fans will achieve even air distribution for your mother plants, keeping their veg cycles in a state of stasis. If you’re looking to give your plants an extra boost, consider implementing a CO2 enrichment system. This step requires the ability to closely monitor and control CO2 levels to avoid any potential harm to your plants.
  • Establish a consistent watering schedule that’s responsive to the visual cues your mother plants give you. Paying close attention to their appearance and growth stage will guide you in adjusting their water and nutrient intake. 
  • To that end, daily inspections of your mother plants are critical. Be on the lookout for any signs of stress, pests, or disease. Regular pruning not only helps in controlling plant size and shape but also encourages healthy growth.
  • Lastly, do not overlook nutrient management in your mother room. Each strain and individual plant may have its own specific nutritional needs, and that’s paramount to the proper maintenance of the genetic line. By implementing a tailored feeding regimen and regularly testing the soil or hydroponic solution for nutrient content and pH levels, you can adjust your feeding strategy as necessary. Early detection of nutrient deficiencies or excesses, along with prompt treatment, is fundamental in maintaining the health and productivity of your mother plants.

Strict Sanitation and Hygiene Protocols

Perhaps more than any other room in your facility, the sanitation of your cannabis mother room is of critical importance. This is your genetic bank vault, after all.

Set up a daily surface cleaning routine for this room, and keep your team members up-to-date on SOPs. This includes entry protocols (and possibly uniforms and footbaths). 

On that topic: While we all enjoy giving tours to curious news media and to interested stakeholders, you should never tour visitors through a mother room. Allow only a limited number of staff into your mother room. Protect it at all costs!

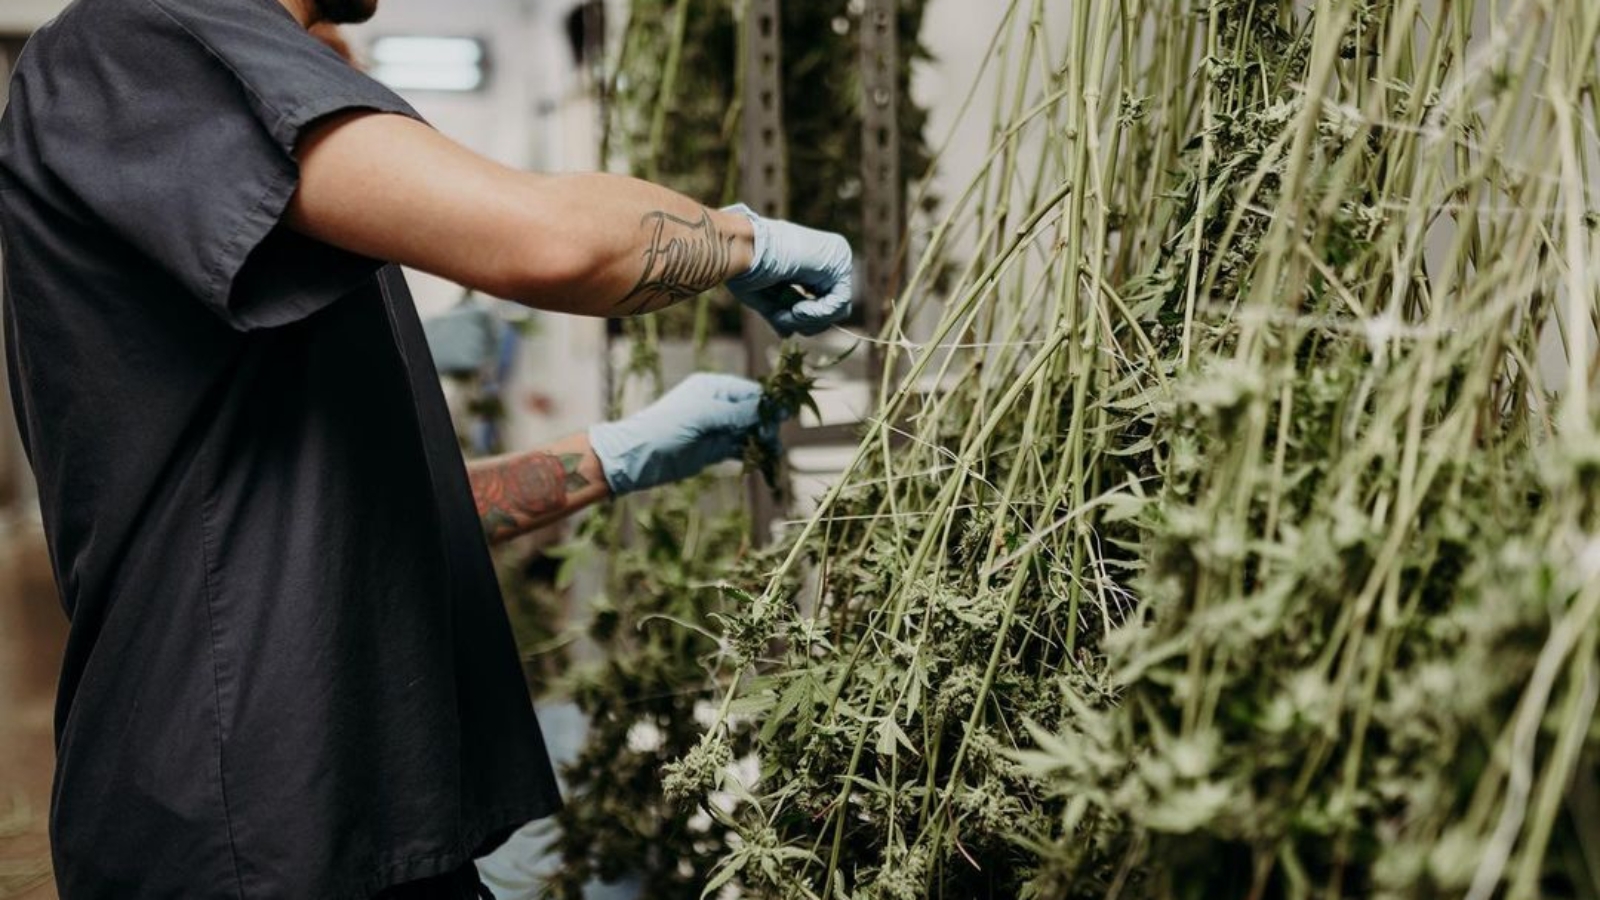
Use only one pair of pruning shears per mother plant, and don’t cross-contaminate them. The risk of hop latent viroid (HpLVd) is ever-present in facilities, and a pathogen like that could decimate your mothers (and thus your bottom line). Regularly sterilize all pots, trays, and other equipment used in this room. Any equipment relating to the mother room should not be used anywhere else in your facility.

To ensure a sense of uniformity across your plants and across time, develop a pruning schedule to manage plant size and shape. Training team members in proper pruning techniques is crucial to ensure they promote healthy growth without stressing the plants.

That pruning plan leads us to…

Cloning Procedures and Record Keeping

Cloning: where the true magic happens in your facility.

Follow a consistent cloning schedule, and make sure you’re building this schedule on sound reasoning (take your six-inch cuttings and rootings at the right time to maintain plant health). Document all records associated with each plant and its clones. Those records will inform later improvements in your mother room.

Observe the quality of those clones over time. How are they performing as they move through growth cycles? Those plants’ health will help you understand your mother plants’ health. Investigate and address right away any declines in cloning efficiency or quality.

Pro Tip: Implement regular data backup procedures to prevent loss of valuable genetic and cultivation records. Ensure that your digital tracking system has robust security measures in place to protect sensitive information and comply with regulatory requirements.

Regular Training and Education

Lastly, like most other activities in the cultivation space, work in the mother room is an ongoing education. Encourage your team to stay informed on the latest cultivation and genetic trends in cannabis.

Even in cultivation team meetings that don’t specifically address the mother room on the agenda, try to connect what’s happening in the mother room to broader developments in the business. Make sure that all employees are aware of what genetics you’re maintaining.

Coordination with the flowering team and sales staff is crucial for managing a cannabis mother room; you don’t want to be cutting clones of a cultivar that is not selling, or for a cultivar that is piling up in your finished product storage room. 

Mother rooms dictate the flow of product to the rest of your facility and ultimately to your sales channels.

The mother room team can greatly influence the culture of your business; and promote a culture of shared knowledge across the facility. Make sure that your mother room team is keeping other cultivation teams informed on any changes at the individual mother plant level.

Get a FREE Grow Consultation

How to Build a Flower Room For an Indoor Cannabis Facility

How to Build a Flower Room For an Indoor Cannabis Facility

Pipp Horticulture

What You Need To Know About Your Cannabis Flower Room

The flower room is the soul of the indoor cannabis facility. It’s where all tours with business partners and excitable local press corps members ultimately culminate, garnering wide-eyed looks of excitement. It’s where all the best traits of a cannabis cultivation company are on display. But those moments only scratch the surface of those rooms’ capabilities. The flower room is where a cultivation business turns plant material and ambition into revenue and growth.

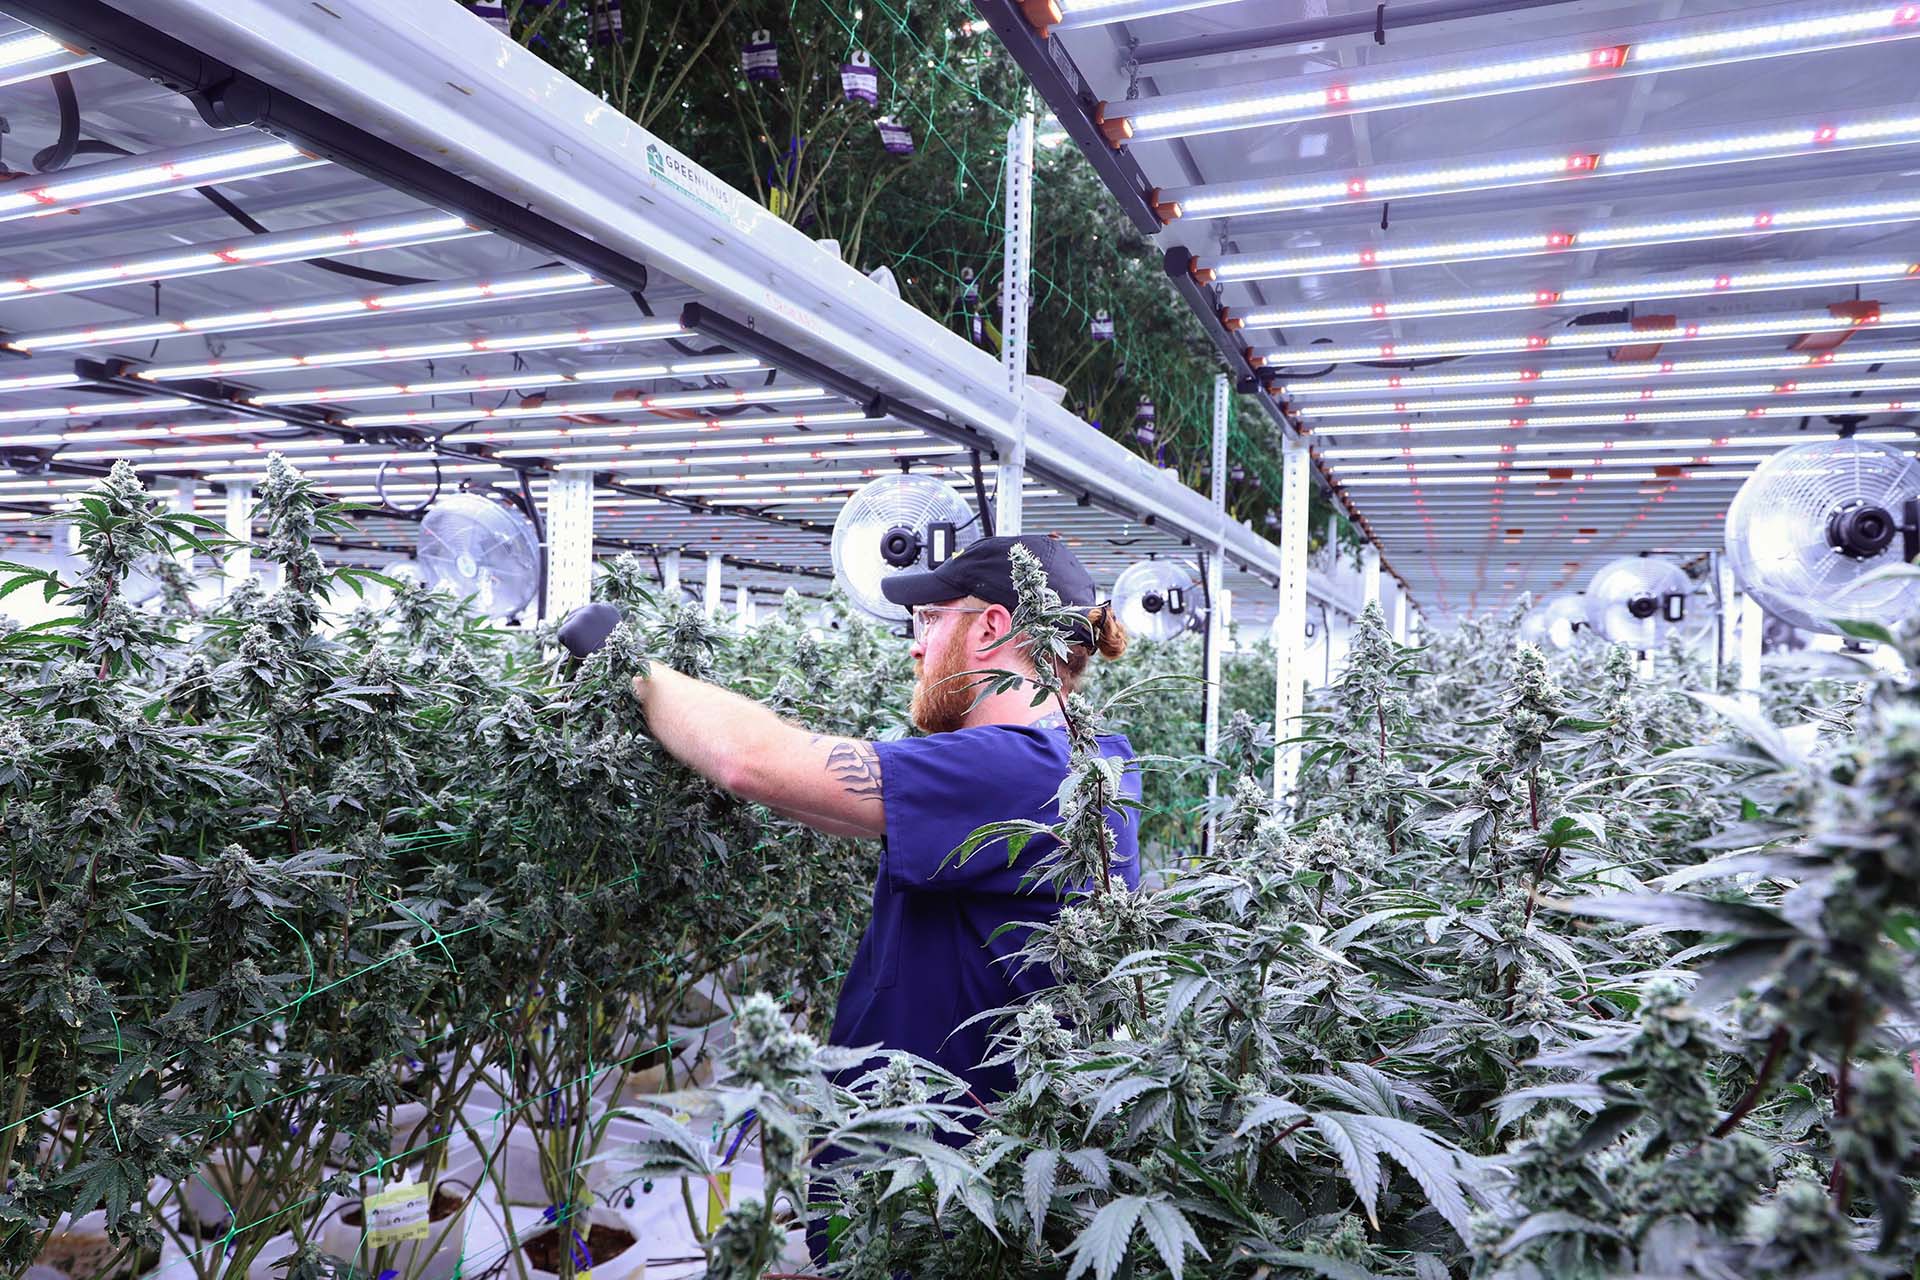
While “yield” has remained a cornerstone metric for cultivation businesses’ success since the dawn of the industry, this basic fact is only becoming more pertinent. Price compression, oversupply, rapidly evolving consumer demand trends: There are factors at play that demand new efficiencies coming out of the flower room. Yield is more important than ever, and your team can achieve great metrics by dialing in flower room design and operations. The design phase is a perfect opportunity to consider your broader flower room strategy, of course, but you can implement new efficiencies as you learn more about what works for your business. 

So, what sets any cannabis flower room apart from one another? Aside from the people working in those rooms, there are several fundamental aspects of good flower room design that must be accounted for in the early planning stages–and optimized on a regular basis once operations have commenced.

Consider:

  • Spatial Configuration and Plant Density
  • Integrated Environmental Control Engineering
  • Proper Air Flow and HVAC
  • Light Mapping and Design
  • Irrigation and Fertigation Infrastructure

Get those core concepts wrong, and your team will miss out on opportunities for stratospheric growth and output. Get them right, though, and you set yourself up for success. After all, what comes out of your cannabis flower room is all about what goes in. 

Spatial Configuration and Plant Density

Environmental controls, efficient HVAC equipment, sufficient lighting: We’ll get into those technological aspects in a moment. Even more important than your software and hardware, however, is the actual floor plan of your flower rooms. People need to walk through these rooms scouting plants, cutting down plants, transporting plants, and ultimately turning over the room entirely for the next cycle. That’s a lot of movement! And your plants must be spaced evenly to ensure healthy, consistent growth and optimal yield for your business. You want to get the most out of your room, but not to the detriment of individual plants’ health. Your airflow and lighting plans will have given you a good base from which to arrange the actual benching in your flower room. How many plants can you sustain, given your equipment?

Consider mobile vertical racking systems to maximize this density while preserving the room’s foot traffic flow. You won’t waste an inch of space by adding mobile carriages  to your vertical racks, which eliminates fixed aisles between each rack. Mobile carriages will also provide a degree of flexibility when it comes time to expand your canopy or revisit your floor plan outright. Even the best-laid plans in indoor cultivation will be amended as your team hones their operation. By investing now in a more mobile solution, you’ve just bought yourself some serious room to grow in the future.

Plan to fill out those vertical racks with grow trays that allow you to seamlessly connect the technology that we’ll get into in a moment: your lights, your airflow, your irrigation. Picking the right grow tray might seem like a small step, but it’s a fundamental part of your workflow.

WANT TO LEARN MORE? Design your own grow space with Pipp’s Room Generator Tool!

Pro Tip: Different genetics result in different phenotypes. If you’re considering a fairly diverse portfolio of cultivars, implementing  vertical racking will allow you to place smaller plants higher, leaving more room on lower racks for taller plants. This height disparity can get very tricky when you’re managing airflow and lighting across a single plane of benches.

Integrated Environmental Control Engineering

It’s not enough anymore to have functioning environmental controls. The competitive nature of the cannabis marketplace insists that operators implement some form of integration and automation into their systems. Your team needs real-time data. As you design and build your flower rooms, you must plan for this integration.

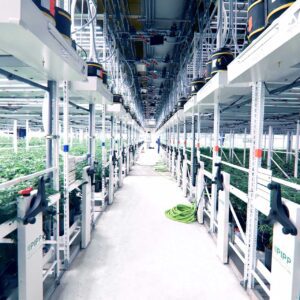
The cornerstone of a successful cannabis flower room is its environmental control system. We’ll get into the specifics of HVAC, lighting, and irrigation shortly, but first, we must point out the importance of linking these technologies. Automation and data analytics go hand in hand with the actual horticultural practices of your flower room. 
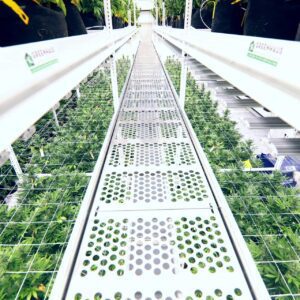
Your team will be in and out of your flower rooms, scouting individual plants, but so too will your environmental control systems analyze real-time data and identify trends among your crops. How are your plants responding to subtle changes in lighting or airflow? Which individual plants are receiving too much or too little light at a given moment? That data, as one minor example, is critical to understanding your flower room. By leveraging this data, growers can fine-tune their environmental parameters for optimal yield and quality.

So, where should your team begin? Develop your flower room design around programmable logic controllers (PLCs) that automate environmental inputs on a real-time basis. Ensure that your sensors are appropriately placed around the room to provide those PLCs with a comprehensive data set. Most data collection can also be conveyed via a given software provider’s app, allowing you and your team immediate access to real-time data and, of course, to sudden emergencies. This data can and should inform your cultivation decisions. Understanding that app should be an important part of your cultivation team onboarding process.

Every plant coming out of your flower room represents a small portion of your company’s bottom line. The data you’re receiving about how those plants are growing can help your team make decisions about what to grow and what to sell (and when to sell). This data collection allows a savvy cultivation team to draw a competitive flower room edge.

Proper Airflow and HVAC

Airflow is critical to a cannabis flower room, where microclimates lurk and threaten the health of your plants. This is especially true in a vertical growing environment. While all inputs are critical in your flower room, airflow may be the one variable that can be the most limiting if you fail to execute for your facility’s and plants’ needs. 

Good air circulation can go a long way toward preventing the spread of more nefarious problems like pests and pathogens. Your HVAC system must exchange the air in your flower room several times per hour, balancing clean oxygen and CO2 levels for optimal plant growth. This means that your HVAC system will be working constantly in the background, so efficiency in your hardware is key.

Use HEPA filters in your ventilation system to remove any airborne pathogens. Indoor cannabis cultivation spaces, no matter the square footage, must be paragons of cleanliness and sanitation. If you’re designing a room as part of a new build, you can incorporate this from the start. 

Retrofit projects come with much more pressure on this particular point. Make sure the actual room you’re planning as a future flower room has the HVAC and ventilation capabilities to house flowering cannabis plants safely. Always bear in mind that we’re talking about plant material grown for human consumption. 

WANT TO LEARN MORE? Vertical Air Solutions’ patented In-Rack Airflow System provides uniform airflow in a multi-layered rolling rack platform.

Establish a regular maintenance schedule to keep that ventilation system as clean as can be. Delegate specific maintenance responsibilities to team members on a rotating basis so that everyone can dial in their understanding of the system. When it comes to energy efficiency, HVAC is one place where you can really invest for long-term savings. Work with your equipment provider to identify energy-efficient units and map out the cost of those units over time.

Pro Tip: Manage heat load from other pieces of equipment (more on lighting in a moment) and measure the capacity required to maintain a consistent temperature and humidity level in the room. Variable-speed fans can provide the flexibility needed to maintain those levels throughout the day.

Light Mapping and Design

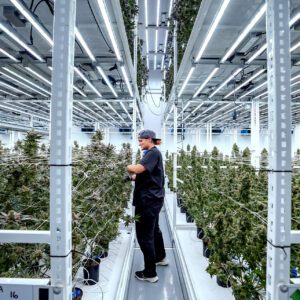
Lights get the spotlight in cannabis cultivation, and perhaps deservedly so. A good cannabis flower room design will include light mapping projects as the buildout gets underway–and well into operations. Where will you place your light fixtures for optimal plant growth? How will you know which setup is ideal for your crop?

As you’ve noticed thus far, a keyword in flower room design is “consistency.” You can use software to map a room’s light intensity. This will give you a more refined picture than simply using your own eyes to gauge your room’s setup. You need to understand how much light a given plant is going to receive from all light fixtures that “touch” it. These programs coordinate each spot’s given light intensity by measuring light from as many as nine angles around the plant. This will give you a better sense of the uniformity of your light distribution. Much like you can avoid microclimates with uniform airflow, you can avoid hot spots with uniform lighting. 

Get familiar with the calculator for photosynthetic photon flux density (PPFD) and ensure that you’re covering the canopy. Within that coverage in your flower room, you want to recreate the sun’s own diurnal rhythm as closely as possible. While your veg room will operate on something close to an 18/6-hour cycle, your flower room will be on a 12/12-hour cycle of darkness and light. (Consider, too, the potential power of inter-canopy lighting.)

Pro Tip: Be mindful of light pollution streaming in from hallways. It might not seem like a big deal when so many more consequential investments are being made early on, but photons leaking in from the hallway can have an outsized impact on your plants’ health. As an added precaution, consider using green light spectra (near 530nm) in the hallway outside your flower room(s) to limit any problematic spillover effects. 

Irrigation and Fertigation Infrastructure

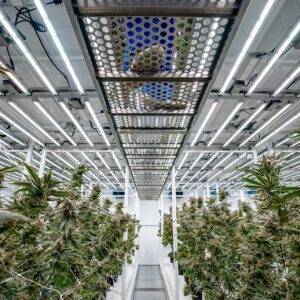
Irrigation and fertigation are critical aspects to your flower room design and to the finished flower you’re harvesting. Perhaps nutrient recipes are more proprietary than light maps. Nonetheless, anyone working on designs for a new indoor facility’s flower rooms or for a series of retrofitted flower rooms must consider the source of water and the delivery of that water (and those nutrients).

Once again, consistency will drive this facet of your flower room plan. Automated drip irrigation systems or hydro setups can deliver uniform amounts of water and nutrients to each plant with minimal interruption to the floor plant mentioned in the previous section. You don’t need hoses lying around your flower room; you need solutions. 

Within those systems, make sure your environmental controls include monitoring of pH and electrical conductivity (EC) to continue that consistent nutrient delivery. Overwatering, underwatering: Nothing good comes from being imprecise with your irrigation system. 

Cannabis Flower Room Efficiency Checklist

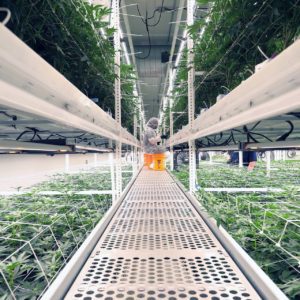
  1. Regularly check and maintain the HVAC and ventilation systems to ensure the CO2 supply is working correctly. Systematize this process as part of your team’s SOPs.
  2. Inspect your lighting fixtures, first through your environmental control data and then by physically examining any units that need maintenance. Clean them regularly.
  3. Same with your fan units: Keep the room’s air moving efficiently by maintaining fans and air filters regularly.
  4. Maintain a highly detailed sanitation protocol.
  5. Ask your cultivation team members what they think about the literal floor plan: How easy is it to get their jobs done within the flower room(s)?
  6. Check your irrigation and fertigation systems for any unexpected issues, and ensure your plants get the right amount of nutrients.
  7. As a senior-level management team, periodically review how well your flower room is running and look for ways to save energy and resources.
  8. Ensure all team members are well trained in your company’s flower room safety SOPs and regularly review and update operational procedures.

Get a FREE Grow Consultation

harvest

5 Things US Cannabis Operators Need to Know About GACP & GMP

5 Things US Cannabis Operators Need to Know About GACP & GMP

Pipp Horticulture

Setting the Standard

Good Manufacturing Practices (GMP) are vital quality assurance standards ensuring product consistency and safety across industries. They prevent errors, safeguard worker health, and protect the public. GMP is essential in pharmaceuticals, food, cosmetics, and more. This blog explores GMP principles, the absence of GMP guidelines in the US cannabis industry, and how businesses can prepare for future regulatory changes. We’ll also discuss GMP’s influence on architectural design and introduce Good Agricultural and Collection Practices (GACP) for medicinal plants, emphasizing GMP’s continuous pursuit of manufacturing excellence.

1. What is GMP?

GMP, or Good Manufacturing Practices, is the quality assurance process in product production that ensures product consistency and quality. GMP guidelines and compliance are critical for quality assurance, worker safety, and protecting human health. GMP prevents errors and inconsistencies that cannot be eliminated through quality control of the finished products and consumer goods. With GMP, it is possible to be sure that every unit of medicine or consumer goods manufactured is of the same quality as the units of medicine tested in the laboratory.

Key Principles of GMP:

  • Creation and enforcement of Standard Operating Procedures (SOPs).
  • Comprehensive documentation of all procedures and processes.
  • Validation of SOP effectiveness.
  • Development and implementation of efficient working systems.
  • Development of employee competencies.
  • Regular maintenance of systems, equipment, and facilities.
  • Prioritizing cleanliness to prevent contamination.
  • Ensuring quality is central to the design, development, and manufacturing workflow.

2. Why are there currently no GMP guidelines for cannabis in the United States?

In the United States, the Food and Drug Administration (FDA) recommends guidelines for anything food, cosmetics, drug, or pharmaceutical-related. These guidelines consist of processes, procedures, and documentation that ensure manufacturing consumer goods are consistently produced and controlled according to set quality standards. Unfortunately, as the federal law currently states, the use, sale, and possession of cannabis containing over 0.3% THC by dry weight remains illegal as a Schedule I drug type under the federal Controlled Substance Act of 1970, despite laws in the majority of states that have enacted legislation permitting exemptions for various uses, including medical, industrial and recreational use. 

Because cannabis is currently a Schedule I drug type (sadly, the same category as Heroin and MDMA), federal agencies, such as the FDA, have not developed GMP guidelines for licensed and compliant cannabis operators. As a result, state lawmakers and cannabis business owners are forced to navigate this new and rapidly evolving industry without any standardized guidelines. 

On August 29, 2023, the Department of Health and Human Services (HHS) recommended rescheduling marijuana from Schedule I to Schedule III under the Controlled Substances Act (CSA) to the Drug Enforcement Administration (DEA). However, in the near term, this recommendation is unlikely to significantly impact the cannabis industry because the Drug Enforcement Agency must now conduct its review and decide whether to follow the HHS recommendation. It also does not legalize cannabis. State-licensed cannabis businesses will still be operating in violation of federal law. However, in the long term, the FDA could provide specific guidelines or subject cannabis to existing regulatory authority.

3. What can cannabis business owners do to be
GMP-ready as legislation changes in the future?

Cannabis operators can get critical insights into what GMP guidelines may potentially look like in the future for the US from global cannabis companies that are certified EU-GMP. Some of the differences between EU-GMP and US-GMP are that the EU-GMPs require manufacturers to have a pharmaceutical quality system (PQS), encompassing a broad range of quality management activities. The US-GMPs emphasize the establishment of a quality control unit (QCU) and use quality systems but do not have a specific requirement for a PQS.

Basic Requirements of EU-GMP:

  • All manufacturing processes are clearly defined, systematically reviewed in the light of experience, and shown to be capable of consistently manufacturing medicinal products of the required quality and complying with their specifications.
  • All critical steps of manufacturing processes and significant changes to the process are validated.
  • Appropriately qualified and trained personnel.
  • Adequate premises and space. 
  • Suitable equipment and services.
  • Correct materials, containers, and labels.
  • They approved procedures and instructions by the Pharmaceutical Quality System.
  • Suitable storage and transport.
  • Written instructions and procedures in unambiguous language tailored to the provided facilities.
  • Operators undergo training to ensure the correct execution of procedures.
  • During manufacture, operators create records manually or use recording instruments to demonstrate that they followed all steps required by the defined procedures and instructions, ensuring the expected quantity and quality of the product.
  • Any significant deviations are fully recorded and investigated to determine the root cause and appropriate corrective and preventive action implemented.
  • Manufacturers retain production and distribution records in an understandable and accessible form, enabling the tracing of the batch’s complete history.
  • The distribution of the products minimizes any risk to their quality and takes account of Good Distribution Practices.
  • A system is available to recall any product batch from sale or supply.
  • The team examines product complaints, investigates the causes of quality defects, and takes appropriate measures to prevent the recurrence of defective products.

4. How does GMP impact architectural design?

GMP can significantly influence the layout of a cultivation, extraction, and manufacturing facility and the selection of construction materials and equipment. The industrial architect must design the facility per the GMP regulations when applicable. Facility design for a GMP-compliant warehouse includes having designated areas for raw materials, finished goods, quarantine products, rejected products, etc. The warehouse must be dry, clean, and well-lit. The storage conditions shall be as per the material requirements.

Features to Incorporate in Facility Design:

  • Design and construct the facility to ensure hygienic production conditions.
  • Building materials, when applicable, should be easy to clean and sanitize.
  • There should be no way for the entry of insects, pests, birds, vermin, and rodents.
  • The facility should be spacious.
  • The facility has to be at a location where there are no fumes. The design should prevent any fumes or infestation of the product.
  • There should be covering on walls and floors, and surfaces should have cleanable surfaces.
  • The facility area should be free of cracks and open joints to avoid dust collection.
  • There should be segregation between departments and, in some cases, bio-secure vestibules for changing out personal protective equipment (PPE).
  • The facility infrastructure design should have a dedicated HVAC system based on area classification.
  • The facility should have a flexible layout.
  • The design must provide well-lit, ventilated production areas with air control facilities.
  • Design the drainage and plumbing system to prevent backflow and ensure adequate sizing.
  • Avoid open drains.
  • The construction process should not cause any negative impact on the environment.
  • The facility should have a provision for secure, hazardous, and inflammable materials as per the regulations.
  • Design a proper fire protection system.
  • Piping, electrical fittings, and other utilities should not create a recess.
  • Provide coloring and direction of flow on service lines.

5. What is GACP?

The World Health Organization (WHO) developed GACP, or Good Agricultural and Collection Practices for medicinal plants, in 2003 to enhance the safety, efficacy, and sustainability of medicinal plant material used in herbal medicines in the market. Specific to the cannabis industry, GACP consists of the practices used during agricultural production, which includes processes and procedures in the following stages: Tissue Culture, Mother/Stock, Propagation, Vegetative, Flowering, and Harvesting. Typically, the drying stage and all manufacturing after drying is where the transition happens from GACP to GMP.

Main Objectives of GACP Guidelines:

  • To contribute to the quality assurance of medicinal plant materials used as the source for herbal medicines to improve finished herbal products’ quality, safety, and efficacy.
  • To guide the formulation of national and regional GACP guidelines and GACP monographs for medicinal plants and related standard operating procedures.
  • To encourage and support the sustainable cultivation and collection of medicinal plants of good quality in ways that respect and support the conservation of medicinal plants and the environment in general.

Key Takeaway

GMP compliance is a continuous journey, not a destination. Regular audits, swift identification of potential deviations, and corrective actions are all part of this process. Embracing a culture of continuous improvement and having a team that understands and implements the principles and components of GMP are the first steps towards ensuring ‘Good’ Manufacturing Practices become ‘Great’ Manufacturing Practices.

Get a FREE Grow Consultation

Best Practices For Multi - tier Cannabis Cultivation

Lessons Learned – Best Practices For Multi-Tier Cannabis Cultivation Speaker Session at Cannabis Conference

Lessons Learned – Best Practices For Multi-Tier Cannabis Cultivation Speaker Session at Cannabis Conference

Knowledge is Power!

Have you ever wondered if your facility is ready for that next phase in your process or if multi-tier cannabis cultivation is your calling? Our expert team presented at this year’s Cannabis Conference in Las Vegas, discussing lessons learned in the industry and best practices for multi-tier cannabis cultivation.

Listen as Michael Williamson, Director of Cultivation, Anders Peterson, Director of Horticulture, and Del Rockwell, Product Manager at Pipp Horticulture, examine the design of a space, such as keeping in mind room layout and how to incorporate your HVAC to have consistent airflow, while sharing tips and tricks on how to manage your canopy operation best and creating a harvesting strategy to stay consistent.

You will want to take advantage of this opportunity to hear from industry experts to learn something new you may want to incorporate into your daily routine!

Watch full session below!

Get a FREE Grow Consultation

Fog City Farms

10 Essential Tips for Creating a Controlled Environment Agriculture (CEA) Facility

10 Essential Tips for Creating a Controlled Environment Agriculture (CEA) Facility

Vertical Air Solutions

Setting up a Successful CEA Facility

Controlled Environment Agriculture (CEA) has transformed the agricultural landscape, offering innovative solutions to traditional farming challenges. As urbanization increases and the demand for locally grown, pesticide-free crops increase, CEA facilities are gaining prominence. But setting up a successful CEA facility requires careful planning and foresight. Here are ten expert tips to help establish a thriving CEA operation.

1. Create a Comprehensive Plan

Setting up a Controlled Environment Agriculture facility requires a well-thought-out approach, accounting for many factors ranging from finance to nuanced design and engineering elements. One cannot overstate the importance of a comprehensive plan in ensuring your CEA facility’s efficiency, sustainability, and profitability. Investing time and effort into crafting a comprehensive plan can be the difference between the success and failure of your CEA venture. This plan should include: 

Business Plan

Start with a thorough business plan. This Business Plan should be the roadmap that guides your journey. Understand your target market, identify supply gaps, determine the crops you plan to produce based on market demand, and research the competition. 

The business plan should outline your marketing strategy, pricing model, and sales approach. Consider external factors that might influence your business, such as regulations, competition, market fluctuations, technological advances, and environmental concerns. Building flexibility into your business plan can help you adapt to unforeseen changes.

Financial Proforma

This is a critical component of planning that will have implications throughout the operations lifecycle. A financial proforma provides projections for revenues, expenses, and profitability. Your proforma should include estimates for initial startup costs, operating costs, anticipated yields, and selling prices. You must also factor in technology costs, testing, labor, genetics, nutrients, advisors, sales and marketing, and utilities. 

This document is crucial not only for internal budgeting but also imperative when seeking external financing or investors. Remember to regularly revisit and adjust your financial proforma as real-world data from your operations flows in.

Facility Design

Designing the facility is one of the most crucial yet challenging components of setting up a CEA. Whether you’re conceptualizing an indoor vertical farm, greenhouse, or another type of CEA environment, the design should optimize space, ensure efficient and ergonomic labor, minimize utility consumption, and promote high yields. 

Consider light sources, ventilation, environmental control, pest control management, and workflow. A well-thought-out design can significantly influence the efficiency and productivity of your CEA setup. If possible, involve experts or consultants in this phase to benefit from their experience.

2. Define Your Goals

Defining clear and measurable goals ensures success, strengthens morale, and maximizes resources when setting up a CEA facility. Before diving into the technicalities, clarify your objectives. Are you aiming for a specific ROI, year-round production, specific crop production, organic, and or GMP certification? Your facility’s design, technology, and operating procedures should align with these objectives. Early in the planning stage, it is essential to identify the type(s) and volume of crops you intend to cultivate. Each crop will have unique environmental needs regarding light, humidity, temperature, CO2, and nutrients. Once you’ve identified the crop, set clear yield objectives. Your infrastructure, technology, and financial investments will largely pivot on this decision. By defining goals clearly and precisely, informed stakeholders can align to ensure their facility’s resilience, profitability, and community impact.

3. Choose the Right Location

While Controlled Environment Agriculture facilities offer greater environmental control, location still matters and can impact nearly all variables operators manage. Here are a few factors to consider:

Energy Availability

Understand your power requirements. Ensure you have access to consistent, affordable energy sources. Lack of power can significantly impede optimization or worse.

Water Quality

Access to clean water is crucial. Test water for contaminants and consider and establish a purification system based on the results.

Logistics

Proximity to suppliers and markets reduces transportation costs and ensures product freshness.

Labor Force

Ensure access to the appropriate labor force at rates within the allocated budget.

4. Plan for Scalability and Future Expansion

When planning your facility, defining your goals, and selecting a location, don’t neglect to consider scalability. Planning for scalability and future expansion in a Controlled Environment Agriculture facility is a multifaceted endeavor that can save significant time, effort, and money. Developing a modular design is a practical approach to ensuring scalability, designing, and constructing in a way that allows for easy expansion or integration of new sections. Your modular design involves conceptualizing the physical structure, electrical, plumbing, and other systems to be expandable. Operations can add new modules or zones with minimal downtime and impact on existing processes.

A scalable CEA facility doesn’t just refer to infrastructure and technology; it’s also the team operating it. Continuous training programs ensure a prepared workforce to handle expansions and adopt new technologies. Focusing on workforce development ensures that personnel are ready to take on managerial roles as the company scales. Scaling operations often require significant capital. It’s crucial to have a clear financial roadmap that outlines the resources needed for future expansions. Scaling operations may entail setting aside a portion of profits for reinvestment, exploring external financing options, or partnering with investors who understand the vision of the business. Finally, it’s essential to have mechanisms in place to gauge market demand constantly. Scalability should be in line with market needs. By establishing strong feedback loops with distributors, retailers, and end-consumers, the CEA facility can fine-tune its expansion plans to better align with market dynamics.

5. Optimize for Space

Optimizing space in a CEA Facility is paramount, given the premium costs associated and the need to maximize yields to ensure profitability. As urban farming and indoor agriculture continue to gain traction, operations are constantly searching for innovative techniques and technologies to maximize output in limited space. A groundbreaking innovation in this space is the development of mobile vertical farming racks. Mobile vertical grow racks allow farmers to utilize unused aisles and vertical space, which is particularly relevant in urban settings where horizontal space is often limited. By stacking crops on top of one another, these racks can dramatically increase yields in a fixed area and their mobility allows for additional space optimization by eliminating static aisles and improves plant maintenance, harvesting, and cleaning.

Catwalk systems are another space-saving tool for CEA facilities. They’re advantageous operations where accessing the top tiers of vertical farming racks can become a challenge. Catwalks provide growers with safe and convenient access to all vertical indoor farming setup levels. This ease of access can also speed up farming operations like pruning, scouting, and harvesting. Mobile carts have become indispensable tools in modern CEA setups. These carts are designed and customized for seeding, transplanting, or harvesting tasks. Due to their mobility, they allow workers to move seamlessly from one location to another, carrying all the necessary tools and supplies with them. Utilizing mobile carts saves space and significantly improves operational efficiency, wasting less time moving back and forth.

6. Ensure Proper Air Circulation

One of the essential components contributing to the success of a CEA facility is ensuring proper air circulation and sanitation. Efficient air movement is vital for plant health and crucial for temperature, humidity, and contaminant control, influencing crop yields and quality. The ambient airflow system is at the heart of maintaining an ideal growing environment. Ambient airflow creates a gentle, consistent movement of air that minimizes hot, cold, or stagnant spots and ensures an even distribution of heat, humidity, and carbon dioxide (CO2) around the plants. Proper ambient airflow can also help prevent the growth of mold and other pathogens by reducing the moisture build-up on plant surfaces.

When well-designed, ambient airflow systems can significantly improve plant health and productivity by creating an environment where plants can optimally perform photosynthesis and transpiration. Multi-Level Airflow Systems: For multi-tiered growing systems, multi-level airflow becomes essential. Unlike traditional single-layer operations, multi-tiered systems have unique challenges, as each layer might have slightly different microclimates. The multi-level airflow system addresses these issues and ensures that each tier gets adequate air movement. Design and install these systems to ensure every plant receives a uniform air supply. Additionally, these systems help prevent diseases and pest infestations specific to each level. By effectively understanding and implementing these systems, growers can expect crop quality, yield, and overall plant health improvements.

7. Automate for Consistency

Automation in a CEA facility can encompass a multitude of systems and processes. Consistent automation could range from simple temperature and humidity controls to complex nutrient dosing, CO2 enrichment, and integrated pest management systems. By automating these processes, growers can ensure that plants receive the exact amount of water, light, nutrients, and other necessities at the right time. Such precision maximizes crop yield and quality and minimizes resource waste. When external conditions, such as temperature or sunlight, fluctuate, automation systems can adjust internal conditions to maintain the desired environment, ensuring that plants remain unaffected.

In addition to enhancing crop growth, automating processes can lead to operational efficiencies and labor savings. Modern automated systems often come equipped with data analytics capabilities. Allowing growers to monitor trends, make predictions, and refine their cultivation strategies to minimize utility and nutrient use while adjusting for optimal conditions. Having access to this information not only reduces costs but also lessens the environmental footprint of the facility.

8. Invest in Training and Continuous Learning

Setting up a CEA facility is a multifaceted undertaking that demands an in-depth understanding of various interdisciplinary domains. It amalgamates knowledge from botany, engineering, data science, and even business. As such, training and continuous learning become crucial components for the success of any CEA initiative.

Initial Training

When first embarking on a CEA venture, the team should undergo intensive training on the fundamentals of the system. This type of training could range from understanding plant physiology and its specific requirements for optimal growth to mastering the intricacies of the CEA technologies. Light intensity, nutrient mix, temperature, and humidity must be controlled and optimized. Mistakes in managing these variables can result in crop failure or suboptimal yields, making training a critical investment for long-term viability.

This training isn’t just limited to technicians or the individuals directly handling the crops. Stakeholders at all levels, from managerial to marketing, should fundamentally understand the operations. This training ensures everyone is aligned, leading to efficient decision-making and problem-solving.

Continuous Learning

As with any technology-driven industry, the world of CEA is constantly evolving. New research provides insights into better crop management practices. Technological advancements introduce tools and systems to optimize plant growth and reduce operational costs. Given this rapidly changing landscape, continuous learning is not just beneficial; it’s imperative.

Team members should regularly attend workshops, seminars, and courses. Many academic and research institutions offer specialized programs focused on CEA. Online platforms have become treasure troves of knowledge, with webinars, courses, and forums dedicated to CEA best practices. Leveraging these resources can provide a competitive edge.

Collaborative Learning and Networking

CEA facilities can benefit immensely from networking with similar operations elsewhere. Collaborative learning opportunities can be invaluable, where facilities share successes, challenges, and learnings. Collaborative efforts could lead to shared research projects, the pooling of resources for better training tools, or even joint ventures in exploring new markets or crop possibilities. Leverage the collective knowledge of the CEA community to overcome individual challenges and push the envelope on what’s achievable in controlled environment agriculture.

9. Implementing IPM Program

Implementing Integrated Pest Management (IPM) programs in Controlled Environment Agriculture facilities is essential for ensuring crop health, optimizing yields, and overall success. Due to the controlled nature of these environments, there’s an opportunity to adopt a comprehensive and proactive approach to pest management. IPM focuses on a holistic approach, combining various strategies to manage pests and pathogens rather than relying solely on chemical pesticides. In a CEA facility, it starts with preventing pest entry. Pests mainly gain access via new plants, materials, or humans. Regularly inspecting and quarantining new plants, ensuring the facility is airtight, and having proper hygiene, cleaning, and sanitation protocols can help prevent pest entry.

Continuous monitoring is crucial for an effective IPM strategy in a CEA setup. Use yellow or blue sticky traps to monitor flying insects’ presence and population levels. Once pests are detected, it’s vital to identify them accurately. Not all insects or microorganisms are harmful; some might even be beneficial. Accurate identification ensures that the response is appropriate and effective. Beneficial insects, like ladybugs, predatory mites, and parasitic wasps, can be introduced to manage pest populations. A controlled and sealed environment maximizes the efficacy of releasing these biocontrol agents.

In a CEA facility, growers have the advantage of adjusting environmental parameters, such as temperature and humidity, to unfavorable levels for pests. Physical controls, such as barriers, screens, or UV light traps, can be installed to prevent or reduce the entry and movement of pests. While the emphasis in IPM is to minimize chemical use, sometimes it becomes necessary, especially when pest populations reach threatening levels. In such cases, select pesticides wisely. Preferably, choose those that are least toxic, have minimal residual effect, and are safe for beneficial insects. Rotation of different modes of action can prevent resistance development in pest populations.

10. Continuous Evaluation and Adaption

CEA facilities and associated growing methodologies significantly advance modern agricultural practices, emphasizing precise control over environmental conditions to optimize plant growth and production. This technology-driven approach to farming can be applied in greenhouses, vertical farms, or other indoor facilities and hinges upon continuous evaluation, improvement, and adaptation to optimize crop outcomes. Essentially consistently monitoring and adjusting conditions in real-time to meet plants’ specific needs throughout their growth cycles.

Continuous evaluation in CEA is an ongoing process of collecting and analyzing data on various environmental parameters. By regularly tracking these variables, growers can identify patterns, anomalies, or inefficiencies that may impact plant health, growth rate, or yield. CEA operations often integrate many tools and systems to facilitate the perpetual cycle of monitoring and adjusting. Sensors continuously measure soil moisture content, ambient environmental conditions, and nutrient levels, feeding this data into centralized control systems. Automated irrigation systems can adjust water delivery based on real-time moisture data, ensuring plants receive optimal hydration with minimal waste.

Similarly, climate control systems can regulate temperature and humidity, ensuring they remain within desired ranges. Remote monitoring and cloud-based platforms have become increasingly prevalent in CEA, enabling growers to supervise and manage their facilities from anywhere in the world. Remote monitoring and cloud-based platforms facilitate quicker decision-making and allow for collaboration among experts in different geographical locations.

Conclusion

As our world continues to change, efficient, sustainable, and optimized agricultural production becomes imperative. By following the ten essential tips outlined in this blog, you’re ensuring a well-established foundation for your CEA facility, promising higher yields, optimal plant health, and a significant reduction in resource waste. 

Get a FREE Grow Consultation

Tricks of the Trade Webinar-FB-TW (1)

Tricks of the Trade: Operating a Multi-Tier Cannabis Grow with Maximum Yield

Tricks of the Trade: Operating a Multi-Tier Cannabis Grow with Maximum Yield

Freedom Green

Learn the Tips and Tricks of Operating a Multi-tier Cannabis Growing Space

Are you interested in learning the tips and tricks of operating a multi-tier cannabis growing space? Listen to our most recent webinar, “Tricks of the Trade: Operating a Multi-Tier Cannabis Grow,” presented by Michael Williamson and Anders Peterson with Maximum Yield. This webinar offers an overview of key strategies and insights needed to operate a multi-tier cannabis cultivation facility successfully.

Learn how to improve your facility operations by gaining new insights for your grow room. Discover essential Key Performance Indicators and metrics to enhance your performance and create customized operational strategies for each production phase.

Setting The Stage – Key Differences between Single-Tiered HPS vs. Multi-tier LED Cultivation

Many new moving parts may not integrate when starting and operating a new multi-tiered cultivation facility. By pre-planning and focusing on KPIs, you can stay ahead of your competition by making data-driven decisions. First-time commercial growers should consider having support from an experienced team member or consultant with a proven track record in mobile vertical grow racks. Cultivators with a collaborative approach with teammates and consultants with divergent but complementary skill sets typically result in best-in-class operations. Be prepared to pivot, as the market is constantly shifting. A common concern from a single-tiered high-pressure sodium, HPS, cultivator thinking about going multi-tier is concerns about reaching quality and yield goals.

The main difference between the two is the amount of the anticipated yield. The best single-tier HPS cultivators receive between 90 and 120 grams per square foot, roughly 200 to 260 pounds per harvest. Our typical LED cultivators are between 65 and 80 grams or more per square foot, slightly less than single-tier, but the number of grams will be per tier. Combining those two tiers means we have 132-160 plus grams per square foot, equating to about 285 to 350 plus pounds per harvest. These numbers may not seem like too big of a difference, but when looking at the difference in revenue, three-tiered LED cultivators are getting 190 to 240 grams per square foot; this ends up being about 530 pounds in the same room as a single-tiered HPS cultivator who was peaking at 260 pounds.

Something we also see as a limiting factor to quality and yield that we typically see within multi-tier is the room design itself, specifically around the mechanical system or HVAC design, and poor airflow. If your grow uses HPS, you typically focus on climate and root zone strategies. Those strategies are not very easy to take and apply to LEDs. With LEDs, you will need to slightly change all of your growth parameters to account for a different lighting spectrum. With LEDs, you can push your plants harder with different growth parameters. You can now raise your room temperatures with LEDs to achieve the same leaf surface temperature and VPD.

For more information about the design of multi-tier cannabis grow rooms, head to our previous webinar blog, Multi-Tier Grow Room Design: Measure Once, Build Twice.

Key Performance Indicators (KPI’s)

Key Performance Indicators, KPIs, are how cultivators gauge performance and improve operations each harvest. Using data-driven cultivation with your KPIs helps keep a lot of the guessing work out of growing and allows you to make quicker and more decisive decisions on what is occurring in your garden. There are many KPIs and cultivation metrics to follow, but three main components can typically have the most significant impact on your business. The three components are yield returns, turns or harvests per year, and labor metrics.

1. Yield Returns

Historically when referring to yields we were referring to pounds of sellable product per light. Now, a universal metric to discuss yield is in grams of sellable product per square foot of canopy (or grams per square foot).

Those who have mastered the art of efficient room designs are consistently achieving remarkable yields of 80 grams per square foot in every cultivation cycle. It’s important to note that the key factor separating growers in the lower yield range is the need for mechanical system design, HVAC, and dehumidification improvements. By addressing these crucial aspects, growers can unlock their true potential and reach new levels of success.

2. Turns or Harvests Per Year

We encourage cultivators to have minimal downtime in between harvests. Ideally, this means a next-day room reset after you have harvested your plants – harvesting all of the plants in one day or shift in that flowering room or zone, cleaning and sanitizing that room ideally, same day or the very first thing you do the next morning. Cultivars could even have an evening shift in between if that’s an option, then you’re resetting and repopulating that flower room the very next day.

Cultivators should have minimal downtime between harvests because when you have nine-week flowering cultivars, that will equal 5.8 harvests per year. Each day that you’re not flowering has a significant ramification in potential revenue loss. For example, a 10,000-square-foot flowering canopy estimated at $1,000 per pound would equate to $6.3 million a year. If you take a week for turnaround time between rooms, even five days, that will end up being 5.2 harvests per year, coming out to be $5.7 million yearly.

3. Labor Metrics

Labor is hands down an operator’s most significant expense and can be the most difficult to manage. Labor contributes to roughly 30 to 40% of the cost of production. There has been a shift in tracking labor from a KPI standpoint. We would typically see how many growers there are per light.

A standard number would most likely be about one grower per 50 lights. We look at it in terms of employees per square foot of flowering canopy. Common industry practice is one cultivation employee per 800 to 1200 square feet flowering canopy.

Production Phases

Mother Room 

One of the most significant shifts we’ve seen in mother plant production is moving away from single-tier mother plants to a multi-tier mother plant structure. Instead of growing large mother plants, growers utilize small to medium-sized plants to stagger production. The benefit of working with small to medium-sized mother plants is that you can maintain the mother plants’ health easier and receive more uniform cuttings. All the different uniform cuttings from the side and inside of the mother plants have different metabolism and strength toward lighting.

Production Schedule for Mother Plants:

Typically, you see a production schedule for a grow operation, but rarely do you hear of a mother production schedule. The plants you choose as your mother plants should not be the leftover or aftermath of your veg batch moving into flower; they should be the healthiest of all the plants possible because that is the foundation for the future of all your batches. One trend gaining popularity is a clone-to-kill model or a cut-to-kill model. The advantage of a clone-to-kill or cut-to-kill model is you can only take cuttings off the plant once, and then you destroy that mother plant. These models give you some of the healthiest clones, but the downside is that the plants themselves take up valuable space, so you must create square footage when planning. The benefit of a multi-tiered environment for your mother plants is you can most likely shrink your mother room and have more mother production. When you shrink your mother room, you free up critical floor space for other parts of your operation.

Vegetative Room

In the vegetative phase, this sets the pace for your production cycle, determining how your plants will perform and flower. In this phase, uniformity and consistency batch to batch is critical. Vegetative strategies and lengths vary for every facility based on pot size, plant counts, targeted finished plant height, or tier heights. If you’re growing a lot of new genetics, we recommend measuring the internodal length every few days to track the growth rate and then begin grouping similar cultivars. Depending on how much each cultivar tends to stretch and the height of your growth tiers and flower, you can then vary your veg time from three days up to two or three weeks to get your desired finished plant height. The more dialed in your climate and root zone parameters are in your veg room, the faster your plants will root and grow more shoots, reducing your total veg time and allowing you to get more terms per year out of your cannabis facilities.

Plant Stress

All canopy management or plant training techniques have a cost regarding plant stress, which can add up if you must be more careful and timely in your plant process flow. Compounding stress events can result from multiple stress events all at once. For example, transplanting the plant into a new substrate, skirt or trimming up the bottoms of the plant, topping the plant, adjusting growth parameters like lighting, intensity, what type of lighting, the environment can be different, and humidity as they transition from bench to flower.

Flower Room

When operating a multi-tier flower room, transitioning the plants to flower and timing the stretch is crucial. Before moving plants from the veg room into the flower room, it’s best to preset the flower room’s climate to match the VPD conditions in your veg room. Preseting the room will help limit the stress on the plants during the transition. Once your plants have transitioned into flower, you can expect rapid growth over the first two to three weeks, with plants tripling or quadrupling in size. This rapid growth is the stretch phase of the flower cycle. The goal is to have the plants finish about six to twelve inches away from the lights at harvest, depending on your fixtures.

It’s best to start pinching the taller nodes and weaving branches through the canopy trellis right after transplant to get everything uniform in height, then continue pinching, bending, and trellising throughout the stretch to help with the stretching phase. Your defoliation strategy is also essential and used throughout flower defoliation. Plucking or removing leaves from the canopy to thin it out will help with humidity and airflow issues, along with reducing the number of leaves that have become sinks for valuable plant resources.

Harvesting Strategy

Harvesting is always an exciting time in the cultivation process, but it can be unorganized if not thought through and having a plan set in place. It is always a good practice to do a walkthrough of your flower room one to two days before with whoever is managing that flower room and then to meet with whoever’s working that harvest to have a plan moving forward over the next couple of days to streamline the harvesting.

One technique many people have found helpful in the multi-tier environment to make harvest day and cleanup easier is the dried-down or die-on-the-vine strategy for the last 24 to 48 hours. To utilize this strategy, dimming your lights will lower the signaling senescence and reduce all irrigation. This strategy leverages the transpiration process to dry your plants to get a jumpstart on the drying process before you move them into a dry room. The dried-down or a die-on-the-vine strategy can help dry rooms with undersized humidification capacity. By leveraging transpiration, there is less wet weight to move off the upper and bottom tiers on harvest dates. This strategy can mean the difference in a large flower room of a thousand total pounds you must move in a day, whether that is your substrate weight or the actual biomass itself.

Utilizing Pipp Horticulture’s modular drying carts to help wheel into the flower room to collect the plants for harvest will help minimize plant damage. You can wheel the plants into the dry room, and cultivators can dry them directly on the carts or transition them to drying rack hangers and a whole plant hang technique. It’s essential to wait until all plants are out of the room before cleaning and sanitizing. Handling and moving opened-up substrates, like cocoa, can add particulate fungi and bacteria to the air, contributing to high microbial testing of unfinished flower.

Size the room for your facility layout and dry rooms so that you can harvest a whole room in a single shift, ensuring the entire harvest will fit within a single dry room. If you cannot hold a single crop in a single dry room or do it within a single day, it’s better to have two smaller dry rooms to avoid the issue of plants drying at different rates at different speeds.

In Conclusion

In conclusion, the “Tricks of the Trade: Operating a Multi-Tier Cannabis Grow” webinar can help increase knowledge and skills in facility operations by exploring new perspectives and actionable insights to implement to optimize your processes and drive success. This will ensure a comprehensive understanding of the cultivation process with the knowledge and tools to create a multi-tier grow operation that will succeed in the competitive cannabis market and actionable insights to streamline workflows, reduce costs, and improve plant health and product quality.

Watch the Full Webinar!

Get a FREE Grow Consultation

278402773_1252037735200077_1935213557636436168_n

Harvesting & Drying Checklist: 10 Things to Know

Harvesting & Drying Checklist: 10 Things to Know

Drying Racks

Work Smarter, Not Harder!

In a vertical, multi-tier farm, efficient and effective harvesting and drying practices are essential for maximizing productivity and maintaining the quality of cannabis crops. This blog post will explore some best practices that can be implemented to optimize these processes and ensure successful outcomes in a vertical farming environment.

1. Prune Excessive Foliage

During the last week of the flowering stage, remove the majority of fan leaves and excess foliage while leaving the bud sites undisturbed. By doing this before harvest day, you minimize labor tasks and make the process more manageable. Additionally, it promotes better airflow and a more consistent moisture removal rate throughout the drying room.

2. Pre-Harvest Preparations

One harvest method many growers have found useful is to dim the lights and cease irrigation events approximately 24-36 hours prior to cutting the plants down. By leveraging transpiration during this period, growers can jumpstart the drying process and reduce the load on the HVAC system in the dry room during the initial stages of drying. This method also reduces the overall wet weight of the harvest, including the plant and its substrate, resulting in cost savings and a faster harvest process (i.e. less physical weight for your staff to move from the upper tiers).

3. Minimizing Touches & Transfers

Every touch and transfer increases the risk of product damage, degradation, and contamination. Minimizing unnecessary handling and movement of plants is essential. Aim to complete the harvest and transfer of a single crop into a designated drying room within a day to maximize efficiency and preserve product quality.

4. Utilize Modular Dry Carts

Invest in modular dry carts that facilitate the transfer of plants from the flowering area to the dry room. These carts simplify the movement process, minimize plant damage, and maintain organization within the facility.

5. Choosing the Right Load-In Strategy

Evaluate the benefits of both single load-in and continual load-in strategies. While a single load-in approach (one harvest batch into a single drying room) provides better control over the drying environment and consistency, continual load-in strategies (multiple harvest batches into the same drying room) can support continuous production. A single load-in approach is preferable but choose the strategy that aligns best with your facility’s goals and available resources.

6. Whole Plant vs. Hook n’ Hang

Regardless of the drying method chosen—whole plant or “hook-and-hang”—maintaining consistent plant spacing is vital for even drying. Initially, the drying space may appear crowded, but as moisture content decreases, sufficient spacing is created, allowing for efficient drying and airflow. Whole plant hanging is the preferred method by most growers as it tends to result in a higher quality product, reduced labor tasks on harvest day, and simplifies track-and-trace compliance duties.

7. Maintaining a Controlled Drying Environment

Invest in a properly sized HVAC system with sufficient latent load sizing to remove moisture effectively. The drying rate is influenced by factors such as the total wet weight of the harvest, room temperature, dehumidification capacity, airflow, and time. Increase room temperatures slightly (HVAC systems and dehumidifiers remove more moisture at higher temperatures) if the drying rate is too slow but be cautious to avoid excessive heat that may lead to terpene loss. To preserve product integrity, keep the dry room door closed and lights off as much as possible. Minimize unnecessary entries into the room, allowing for a consistent and undisturbed drying environment.

8. Moisture Content & Water Activity

Tracking moisture content (MC%) and water activity (Aw) levels is a great way to standardize your drying process, reduce your risk of product loss, and maximize your revenue. In the early stages of the drying process, the goal is to get your crop’s water activity below 0.65 to reduce the risk of pathogen proliferation and product loss. Use these readings to fine-tune and optimize your HVAC setpoints, either increasing or decreasing your drying rate by modulating temperature.

9. Achieving the Desired Moisture Content

Target a moisture content between 10-14% for optimal product quality and smoking experience. This range ensures proper drying while preserving terpene profiles and cannabinoid potency. It is a delicate balance; higher moisture contents increase the total sellable weight of your harvest while slightly lower moisture contents increase the total cannabinoid potency on your lab results (less water weight per gram).

10. Minimize the Mess

Harvesting and drying cannabis can be a messy process, but taking certain precautions can help minimize the mess and maintain cleanliness within your cultivation facility. For example, when the drying process is complete, it is best to “buck” or remove buds from stems directly in the dry room. By doing so, you confine the mess to a room that is already in need of cleaning, rather than creating a mess in another clean area of the facility. This approach simplifies cleanup and reduces the risk of cross-contamination between different cultivation spaces. Educate your staff on the importance of maintaining cleanliness during the drying process. Provide training on proper handling techniques, emphasizing the need to work carefully and avoid unnecessary spills or messes. Encourage team members to clean up any spills promptly and maintain a tidy workspace throughout the drying process.

Anders Peterson

About Anders Peterson

Anders is a Cannabis Operations Specialist at Pipp and helps integrate mobile vertical racks and VAS airflow systems into facility designs. He is a leader in indoor CEA facility design and operation, with an academic background in cell and molecular biology and over 10 years of cannabis industry experience.

At 21 years old, Anders co-founded his first legal Prop 215 cannabis company, which manufactured solventless concentrates. He was also one of the first wholesalers of hash rosin in the California medical market and co-founded one of the first medical cannabis dispensaries in Arkansas.

Get a FREE Grow Consultation

Miss It-Multi-Tier Design Webinar-FB-TW (1080 × 1080 px)

Multi-Tier Grow Room Design: Measure Once, Build Twice Webinar with Cannabis Business Times

Multi-Tier Grow Room Design: Measure Once, Build Twice Webinar with Cannabis Business Times

Pipp Horticulture at Culta in Maryland

Designing a Successful Multi-tier Grow Room 

Designing a successful multi-tier indoor cannabis grow room requires careful planning and execution to ensure optimal plant growth and yield. Whether you are a seasoned grower or a beginner, there are several key factors to consider when designing your indoor grow space. Michael Williamson, Director of Cultivation, Anders Peterson, Cannabis Operations Specialist, and Del Rockwell, Product Manager, recently presented a webinar with Cannabis Business Times sharing helpful insights and best practices for designing a successful multi-tier indoor cannabis grow room. During this webinar, the team provided key insights into critical design criteria for consideration before you design and operate an indoor multi-tier cannabis cultivation facility. Topics included pre-design considerations, specifics on each growing system, and starting up your space for the first time.


“Each day of a cannabis life indoors is more than 1% of its total life span. So, every single hour of every single day has an impact. Compare that to a human’s life span, where every day in our lives is less than 0.4% of our life span.”

– Anders Peterson

1. Pre-Design Considerations

During the pre-design phase for your multi-tier indoor cannabis grow room, you’ll want to build a team of experts. When assembling your design team, you’ll want to consider the site selection, space planning, workflow, vendor selection, a comprehensive bid analysis, and how state and local regulations and budget impact your overall design. 


Architecture & Engineering Teams, A&E:

It’s critical to select someone or a firm with a proven track record in multi-tiered cannabis cultivation, facility design, and engineering. Several architects and engineers have served the industry well for over ten years and learned many common pitfalls to avoid. As Michael explains, “What looks good on paper does not always translate well operationally and can lead to bottlenecks, poor workflow, increased labor, and operational expenses.”


Cannabis Consultant

One team member that is critical in the design process is a cannabis consultant. A cannabis consultant assists with equipment selection, helps provide inputs for financial modeling, describes workflows and SOPs, and answers general strategy questions for owners while also serving as the owner’s representative to help answer questions for the A&E team. 


Selecting Vendors

Vendors are a valuable source of information when designing your grow room. Anders explains, “Vendors get to see hundreds of facilities, and many share great insights.” Anders mentions when preparing for an indoor vertical farm, “Choose a group of equipment vendors to work with that have experienced working together on projects, so you can feel confident that all the systems will integrate without custom construction or engineering.” Racking providers like Pipp Horticulture is often the first vendor you engage during the design process because benching layouts dictate the sizing of many systems down the road, such as your lighting, plant count, and even your HVAC capacity. Anders states, “It’s beneficial to establish your racking layout early on in the process and feel confident about it, just to limit the number of revisions and change orders down the road.”


Mechanical, Electrical, Plumbing – MEP 

Your MEP team is your core engineering team. Civil, structural, and environmental engineers may also be involved in your project. In a cannabis grow room design, MEP plays a vital role in ensuring the proper functioning of various equipment and systems required to cultivate cannabis plants.


Comprehensive Bid Analysis

Another important pre-design consideration is to complete a comprehensive bid analysis. A comprehensive bid analysis evaluates and compares bids from different vendors or contractors for a project or service on a “apples-to-apples” basis. A bid analysis aims to select the vendor or contractor that offers the best value for money based on the project’s requirements and budget.

2. Site Evaluation & Budget

Site Evaluation

You may not think it, but there is “an order to things when building a new grow facility, and ideally, you have assembled your design team and engaged some vendors before selecting a building site,” Anders states. Leveraging the experience of your design team and vendors during a site evaluation can help avoid costly building upgrades or delays on your project. 

When choosing a location, always check what utilities you have on-site and, if you have to upgrade them, how long it will take and what it will cost. Anders explains, “More often than not, you’re going to have to run additional power to these facilities, sometimes gas. Most commercial buildings today don’t have the infrastructure that indoor growers need. It’s good to locate a building close to a dense urban area with an established and stable grid.” 

Another consideration for your site is that the roofs of most commercial buildings do not support the heavy HVAC systems required for indoor cultivation. You will want to ensure “plenty of room to mount the equipment on-grade (on the ground) around the building while still leaving space for parking and access for delivery vehicles and such.” 

The climate in the specific area that you are considering for your future grow facility can even impact the performance of your equipment and the operation of rooms. Often nuanced considerations such as these should be considered, which is why assembling a solid team of professionals is valuable.

Key Functional and Physical Considerations

There are specific areas when evaluating a building that you will want to consider when assessing a particular site:

1. Floor Conditions

Del explains that the floor condition is one of the most significant considerations you will want to consider when evaluating a building for multi-tier rooms. Builders will install the multi-level mobile racking systems on the floor, “you need to make sure that the foundation is good and level for this application and equipment.” Avoid cracks and poor-quality slabs.

2. Column Spacing

Column spacing can significantly influence the racking layout and room utilization. “Generally, 40-foot spans between columns is fairly normal, basically as big of a span as you can get and still have the structural integrity to support all the HVAC systems,” Del explains when describing the space between columns.

3. Ceiling Height

Considering the ceiling height and how “vertical” you want to go is something to remember during the site selection process. Not considering the ceiling height can “eliminate some cultivation tiers when looking at going multi-level.” You want to ensure you have the space to grow as tall and high as you want in your grow facility.

4. Location of Facility – Fire Code

Before starting your build, you must understand your area’s fire code. For example, firewalls and room sizes can play into fire code compliance. Contact your local fire marshall for local information or contact other local cultivars to see their experience from a fire code standpoint. The NFPA National Fire Protection Agency has been working on NFPA 420 Codes & Standards, specifically for cannabis cultivation. Del suggests, “Anybody looking at building a facility in the near future to get on the NFPA website and try to sign up for updates.”

 Budget 

Before endeavoring upon the buildout of any indoor grow facility, ensure you have raised the appropriate amount of capital to avoid cutting corners in your design that can impact your business’s performance. Often project costs add up quicker than expected, and tough sacrifices to your design must be made, which can limit a facility’s yield potential and productivity. As Michael would say, this is “Building a Bugatti on a Toyota budget.”

Having a realistic idea of how much you want to spend and staying within that budget will help immensely. Michael states, “Any delays on getting to first harvest have significant and dramatic impacts in the millions of dollars.” Working with a cannabis consultant or an accounting firm can help with financial modeling before designing your building.

3. Facility Planning

Now that you have identified your design team, secured a location, and have a general sense of the rules of engagement, it’s time to plan your grow facility’s macro and micro details. The first step in the space planning process is to create a list of all rooms in the building and put together a narrative about what procedure will be happening in each room. This list will help your architects and engineers understand your goals, the infrastructure requirements for each room, and the feasibility of your design. 

“A strong facility design will typically go through multiple revisions,” Michael states. In contrast, “an efficient design team can develop full construction documents in 90 days or less, assuming that you can answer all their questions and provide them with all the information they need.”


Best Practices for Laying Out Live Plant Rooms Efficiently/Operations Plan

Most cannabis genetics today take, on average, nine weeks to complete the flowering phase. Due to this pre-determined genetic clock of cannabis, “it’s beneficial to have the number of your flower rooms be in multiples of three,” Anders states. Ideally, for example, you have about nine flower rooms, each with a nine-week cycle. In this case, your staff does the same weekly tasks, including a harvest, once a week. This order and timing helps keep your process orderly and smooth. This way, “you can efficiently rotate the veg plants from your veg room into your flower rooms without creating a bottleneck.”

Common Workflows

When planning your facility, you’re trying to create a flow, which Michael calls the “Path of the Plant.” You’re designing around the natural flow or path of the plant. In a cannabis facility, this path typically starts at the mother room, potentially with tissue culture, then to the veg room, flower room, and drying room.

Michael shares, “In a perfect world, if you have a rectangle building, you’re laying out your rooms in a linear line.” A linear layout line helps provide biosecurity strategies with a positive pressurization cascade from clean to dirty spaces. Also, consider the workflow through the facility and how many steps an employee must take to complete their job duties. Michael says, “Every step matters, and every step has a dollar amount associated with it.”

Best Practices When Planning for the Mobility of Racking Systems

A level, or flat, floor is ideal. This fundamental key will ensure the system can continue running and performing as expected. Drainage design is next. We highly recommend using an in-ground trench that is parallel to the track. There are two significant advantages, the ability to accommodate mobility and, ultimately, giving you more cultivation and vertical space for your plants to grow. Electrical and irrigation drops are the next piece to pay attention to where it is most of the time. The most common spot for this is at the front of the system for easy accessibility. 

Next, you will want to keep an eye out for any kind of interference points that would require last-minute adjustments – for example, Del mentions, “low drop ceiling, plumbing coming down inside the walls, columns, or electrical panels can create some interference points that require last minute adjustments on-site during the installation process.” Multiple options are available to access the multi-tiers: Step Stools, Folding or Rolling ladders, Man Lifts, or the best option – ELEVATE® Platform System, built for our Pipp racks and is a safe, flexible, and efficient way to access those upper tiers.

4. Design Recommendations for Each Growth Phase

Mother Room

It is best to have separate rooms for your mother, clone, and veg plants to provide optimum growing conditions while reducing cross-contamination. If you must run a combined mixed-use nursery, Anders states, “We often see these being three tiers with the bottom tier taller to house mother plants and the top two tiers shorter to hold veg plants.” For dedicated mother rooms, we have seen growers shifting away from single-tier, six months to a-year-old mother plants to double stacking smaller to medium mother plants with a shorter lifespan. The smaller, shorter lifespan mother approach provides more supple cuttings than woody cuttings from old moms and reduces the risk of pest and pathogen accumulation.  

Michael explains his process of double stacking mother plants, “generally, I’ll keep my younger mothers on the top elevation, and that elevation will be a shorter elevation, the bottom elevation, which will be a taller elevation so that I can hold my more mature mothers.” He explains that having younger mother plants in your cycle is nice to have fewer issues. Michael can get a significant increase in better “A-grade” cuttings versus the older mother plants. With the older plants, you would need to get cuttings from the inside or the outside where lighting levels aren’t the same. Mother rooms can vary in size depending on how many genetics the grower wants to have available to rotate through production. Double-stacked mother rooms help house additional genetics in a smaller space, allowing you to allocate square footage for flower production.


Clone Room

Clone Rooms are relatively straightforward, with most growers opting to propagate clones on triple-tier wire mesh shelving carts. This “clone cart” design allows growers to fit a lot of clones in a small space. Depending on your cloning SOP and tray inserts, you can fit between three to six hundred clones on one cart.  If you do not have a dedicated clone room, Anders prefers to “house the clone carts on the side of the veg-room rather than in the mother room.” This allows you to enter the mother room less frequently and protect your valuable genetics from unnecessary risk.


Veg Room

Veg rooms are the most common rooms growing multi-tier, where we have seen growers getting most comfortable growing vertically. Anders mentions, “ In the early days of legalization, we understood less about indoor cultivation facility design than we do today. Often, veg rooms were undersized for a facility, creating a significant bottleneck and leaving flower rooms unpopulated for longer than needed.” The natural solution is to take advantage of the cubic footage of your commercial building and grow vertically. “Common best practice now when sizing your total veg canopy for a facility is to allocate between 20% to 30% of your total flowering canopy footprint for veg space.”


Flower Room

“A well-designed and engineered facility can produce, in some cases, up to two to three the amount of yield than of a poorly designed facility of the same size,” Michael states. Pipp has installed more than 2,500 vertically stacked grow rooms over the past six years, and some of the best insights and things we’ve learned are on the design of a vertically stacked flower room. Two-tiered flower rooms are more common than three-tiered flower rooms. However, three-tiers are getting increasingly popular due to the fixed cost absorption of producing more products per square foot. Two versus three tiers also really depend on the constraints of your building, your ceiling height, license type, and how much flowering canopy you need for your business plan.

For labor and harvesting efficiency and climate control reasons, we found that a good sweet spot for the overall size of a flower room is between 2,000-3,000 canopy square feet, regardless of that being two or three tiers. We recommend row lengths of 32-40′ or shorter for good airflow within the room. The longer the rows, the more likely microclimates are to form. Tip: “When it comes to operating a multi-tier flower room, transitioning the plants to flower and timing the stretch is everything. Before moving the plant from the veg room to the flower room, it is best to set the climate to VPD to match the VPD conditions in your veg room to limit the stress.” – Anders Peterson.

Pipp recognized early on that proper airflow is one of the most significant limiting factors to success within a multi-tier grow room. To prevent or reduce microclimates within the space and create a consistent environment, in-rack airflow systems are necessary. Del mentions, “The goal is the have the same environment throughout the room. Whether it’s the first tier or the fourth tier, we’re trying to make it as consistent as possible.”

Vertical Air Solutions, VAS, was developed to be a low-profile in-rack air circulation system that seamlessly integrates with the lighting and the racking to ensure that it is a smaller form factor and takes up as little space as possible. Anders mentions, “Often the most limiting factor to producing quality and good yields of a multi-tier flower room is an improperly designed mechanical system.” What we find to be successful is supplying the air in the front main aisle, letting the in-rack airflow fans capture the dehumidified, conditioned air, and pushing it down the length of the rows. Ideally, these rows are less than 32 to 40 feet to limit air travel distance. And then, the air is returned to the back wall at multiple elevations and completely recirculates along this path. Michael states, “Your in-rack air circulation is only as good as the HVAC system design.”


Drying/Curing Room

For many, the design and operation of a drying room can be challenging and, if not done correctly, can result in a significant bottleneck and degradation of product quality. It balances science, traditional methods, and “respect for the plant.” From a design standpoint, you typically see an undersized drying room and undersized HVAC and dehumidification capacities. Cultivators can grow a beautiful final product that is high quality, yet in a matter of days, it starts degrading from an underperforming dry/cure process. 

There are a wide variety of options and solutions for each grower’s unique approach to drying. Our mobile carts help assist with room-to-room mobility; transferring the plants onto a cart and then into the dry room is a significant advantage. Something to keep in mind when using our dry carts is paying attention to door heights. Choosing door heights and widths that can accommodate the movement of all equipment throughout your facility to avoid issues during startup and operation is essential. 

Tip: “As a best practice, we encourage cultivators to have minimal downtime between harvests—ideally, a next-day room reset. We define a next-day room reset as harvesting all the plants in one day or shift in that flowering room or zone, cleaning and sanitizing that room ideally the same day or the very first thing the next morning. Then you are resetting and repopulating that flower room the day after harvest. Each day that you are not flowering has significant ramifications on potential revenue loss.” – Michael Williamson.

We also provide complete mobile units in a variety of options. Light-duty rivet units are a robust and solid solution but a bit lighter than some bulk racks. Bulk racks for the dry room come with the ability to use the ELEVATE® Platform System, having access to the higher levels. Different options include hang bars, flat wire grids, or cantilever finger bars. The cantilever finger bars provide flexibility and easy access for hanging plants in the dry room. 


Why You Would Choose One Process Versus Another

Some growers prefer to hang the entire plant; others like to break a plant down into individual branches at harvest. Anders mentions, “It’s best to size a dry room to fit a whole harvest from a single flower room at a time.” Most growers today prefer the single load-in strategy of one flower room into one right-sized dry room. Another best practice for a dry room is installing a timer for your overhead lights to help limit photo-oxidation of your product during drying. Install an auto closer on all doors in your dry room to keep the doors shut as often as possible to prevent uneven drying and loss of capacity from your HVAC system. “In summary, each plant stage, including harvesting and the strategies you deploy, can either have a beneficial or non-beneficial impact on the quality of your final product. Tuning your mindset to consider and evaluate not just what you do to plants, but why and how it positively or negatively impacts the end user is the ultimate goal.” – Michael Williamson.

In Conclusion

Designing a successful multi-tier indoor cannabis grow room requires careful consideration of several vital factors. With proper planning and execution, you can create a highly productive and efficient indoor grow room that yields high-quality cannabis. Reach out to the Pipp team with any questions regarding indoor vertical farming. You never know; you might be able to fit more into the existing space you already have. Now that you are prepared to design your multi-tier indoor grow facility, join us for our next webinar, where we will discuss best practices for the day-to-day operation of these facilities and share valuable tricks of the trade.

Watch the Webinar!

Get a FREE Grow Consultation

Untitled design (4)

Room Generator : Design Your Space!

Room Generator : Design Your Space!

Trulieve

Is a Vertical Farm in Your Future?

We are excited to announce our NEW Room Generator Tool! 

Pipp’s new Room Generator is a game-changer for the horticulture industry, allowing cultivators to see their indoor vertical farm in 3-D! The new technology offers a highly interactive experience that gives growers an in-depth understanding of the benefits of going vertical with Pipp Horticulture’s Mobile Vertical Racking Solutions.

With the Room Generator, cultivators can customize their indoor vertical farm by simply inputting the room dimensions, selecting the equipment specifications such as lights, airflow, and tray type, and entering grow information.

They can also adjust the size of their farm and experiment with different configurations to find the perfect setup for their needs. The room generator allows you to build up to 10 rooms and provides a detailed ROI report!

Want to Give It a Try?

Get a FREE Grow Consultation

Drying Racks: The Secret to High-Quality, Potent Cannabis

Drying Racks: The Secret To High-Quality, Potent Cannabis

Drying Racks: The Secret To High-Quality, Potent Cannabis

The Importance of Using Drying Racks

As a cannabis grower, maintaining the quality and potency of your cannabis product is essential to success. Many factors can affect the final product, including humidity level, temperature, and airflow.


One overlooked aspect of the process is the use of drying racks. Below, we will explore the importance of drying racks in maintaining the quality and potency of your cannabis crop and how Pipp Horticulture is leading the way in providing growers with the best drying racks and carts.

Why Proper Drying and Curing Is Important

When growing high-quality cannabis, proper drying and curing are essential steps that you cannot overlook. Drying and curing are the final stages of the cultivation process and can significantly impact the final product’s overall quality and potency. Proper drying and curing are crucial for a few reasons:

Preservation of Potency:

Drying and curing cannabis flowers preserves the potency of the cannabinoids, such as THC and CBD, which are responsible for the desired effects of cannabis.

Improved Flavor and Aroma:

Properly dried and cured cannabis has a better flavor and aroma due to the release of terpenes, which are responsible for the unique scent and taste of different strains.

Increased Shelf Life:

Properly dried and cured cannabis has a longer shelf life, essential for growers who need to store their product for extended periods.

How Drying and Curing Affect the Final Product

Drying and curing impacts the final product’s potency, flavor, and quality. The controlled removal of moisture from the buds during the drying process helps to preserve the cannabinoid and terpene content while minimizing degradation. If the buds are not dried properly, the remaining water can lead to mold growth, which can be a health risk and prevent the product from being sold on the market.

Curing is the process of storing dried cannabis in a controlled environment to further develop its flavor and aroma. Curing allows the remaining moisture to distribute evenly throughout the buds, leading to a smoother smoking experience and a better taste. If the buds do not cure properly, they can become too dry and brittle, negatively affecting the final product’s quality.

Common Mistakes to Avoid

There are a few things that growers must be mindful of during the drying and curing process, which can lead to a lower-quality final product. Here are some things to avoid:

Drying Too Quickly: 

If the buds are dried too quickly (<7 days), it can lead to a harsh,  grassy taste and an unpleasant aroma.

Drying in Direct Sunlight: 

Drying cannabis in direct sunlight can lead to a loss of potency and reduced flavor.

Not Curing for Long Enough: 

If cannabis does not cure sufficiently, the taste and aroma may not fully develop.

Not Properly Sealing Containers: 

If cannabis is not in an airtight container, it can become too dry or moldy.

Benefits of Using Drying Racks for Improving Flavor and Aroma

The proper drying and curing process not only ensures the potency and terpene content of cannabis but also enhances the flavor and aroma profile. Drying racks play a vital role in improving the flavor and aroma of cannabis. Here are some of the benefits of using drying racks for enhancing flavor and aroma:

1. Slow and Even Drying

Using drying racks helps to dry cannabis buds slowly and evenly, which is essential for preserving the natural flavors and aromas of the plant. Slow drying allows the plant to slowly break down the chlorophyll and other pigments, resulting in a smoother smoke and better flavor.

4. Improved Shelf Life

Using drying racks helps to improve the shelf life of cannabis by ensuring that it is properly dried and cured. Properly dried and cured cannabis can last for months or even years without losing its flavor or potency, making it a valuable investment for growers.

2. Prevents Mold and Mildew

Drying racks help to prevent mold and mildew growth during the drying process. Mold and mildew can destroy the flavor and aroma of cannabis, and using drying racks ensures proper airflow and prevents moisture buildup, which reduces the risk of mold and mildew.

5. Enhanced Curing Process

After drying, cannabis buds require curing, which involves storing them in airtight containers allowing them to mature and develop their flavor and aroma profile. Drying racks provide an excellent surface area for curing and help to enhance the process, resulting in a smoother and more robust flavor.

3. Retains Cannabinoids and Terpenes

The cannabinoids and terpenes are in the trichomes on the surface of the buds. Drying racks help to retain the cannabinoids and terpenes that give cannabis its unique flavor and aroma. 

Pipp Horticulture’s Drying Racks

Pipp Horticulture’s Mobile Drying Racks are a leading solution for drying cannabis that offers many features to improve the quality of the final product. Let’s take a closer look at some of these features:

Product Features:

Cost-Efficient Drying Method: Pipp Horticulture’s drying racks offer a cost-efficient way of drying cannabis plants, which helps reduce labor costs and improve overall efficiency.

Adjustable Height: Standard racks are available up to 15′ high, allowing growers to adjust the size of their drying racks to suit their needs. Taller racks are available with engineering approval.

Gray Powder Coating: Pipp Horticulture’s Dry/Cure Room Rivet Racks come with a gray powder coating, which provides an added layer of protection against wear and tear. It is important to note that the powder coating is not antimicrobial or fungal-resistant.

White Powder Coating: Pipp Horticulture’s Dry/Cure Room Bulk Racks feature a white powder coating that possesses properties which inhibit the growth of microbes and fungi.

Hanging Options:

Round Hang Bars: Hang full plants on hang bars with a simple hook attachment that allows for faster trimming.

Finger Bars: Easily hang plants from adjustable cantilever prongs without hooks or wires. The hang attachment comes with 12 rods, which easily adjust along the support bracket.

Grid Hang: Hang plants from any position directly on 4” x 4” wire grid spacing. This style allows for greater air circulation with built-in flue space.

Pipp Horticulture’s Drying Carts

If Pipp Horticulture’s Drying Racks are not an option for your grow facility, our Drying Carts provide an alternative method for drying cannabis. Our different drying carts not only provide a space-efficient method for drying cannabis that requires minimal floor space, but also easy transportation of the product throughout the facility. With a variety of cart styles and options available, our carts can meet all your drying needs. 

  • Drying Cart: Designed to accommodate hanging plants in order to dry them out for further processing with adjustable cantilever-style finger attachments.
  • Nesting Drying Cart: Delivers ease of use, safety, and long life with super heavy-duty construction combined with Z-Base allowing for nesting when not in use. Optional middle hangrail and bottom shelf available.

In Conclusion

Using mobile drying racks and drying carts is a crucial step in the cannabis cultivation process. Pipp Horticulture’s Mobile Drying Racking System offers a reliable and efficient solution for drying and curing your cannabis crop. With adjustable shelves, air circulation, and temperature control, these drying racks can help maintain your product’s potency, terpene content, and overall quality.

To learn more about our products and how they can benefit your grow operation, download our dry/cure ebook. Refrain from settling for a mediocre product when you can achieve excellence with the help of Pipp Horticulture’s drying racks.

Get a FREE Grow Consultation